Flying a kite has been an enduring windy day pastime for so long that historians don’t know when the first kite was invented. Our first written accounts of the pastime come from members of the Han Dynasty in China in 200 B.C. We’re reasonably confident that the earliest known kite-fliers experienced the same delight you would feel to see your own flying contraption take to the skies.
Even if you’re a first time flier, you need to know how to get your kite to launch. If there’s a breath of wind, then that’s usually the easy part. The real challenge is keeping your kite airborne.
Kite fliers throughout history have had to contend with the same forces to get their paper, plastic, or fabric creations to soar: lift, drag, weight, and thrust. If you can balance these forces, your kite will rise. And if you stick to a few pieces of advice, it will fly.
🪁 You love learning new skills. So do we.Let’s learn together.
With the help of some popular YouTube explainers, here are the basic steps for how to fly a kite with minimum stress and more enjoyment!
How to Launch Your Kite 🪁
Whether you’re handling a jumbo jet or a kite, aerodynamic forces rule all flying objects. To launch a kite into the air, the force of the initial lift must be greater than the kite’s weight.
Once it’s airborne, you have to keep the four forces in balance so your kite continues to fly smoothly. That means lift must equal the weight of the kite, and thrust by the wind must be equal to drag, the kite’s resistance to movement through the air.
Of course, nobody flies a kite with a pad and pencil to determine the physics of the moment, so these principles are learned through experience. The feel of the tautness in the line, the jerk of the kite as it struggles to maintain its orientation in an uncertain wind, and the sight of kite tails pointing in the breeze, indicate what to do next.
A good rule of thumb is to start your flight with the wind at your back. That way, when you let go of your kite, you can keep an eye on it as it rises in front of you. Choose a location that has a quarter to half a mile of clear space behind you, according to kite enthusiast Chris Maxa, who demonstrates how to fly a kite. Flying near trees and power lines is a bad idea. Avoid going out in stormy weather too, in case of lightning strikes. If your kite has tails, pay attention to what direction they are blowing, because they’re an indicator of wind direction.
The beach is always a good option when choosing a location for flying a kite, because it usually has a strong offshore breeze. Hold the kite in your non-dominant hand and the spool in the other. You’ll notice that the kite is already picking up the breeze. Now let go of the kite and grasp the spool with both hands. When you feel the kite pulling away from you as it catches an updraft, let your string spool out a bit.
You can employ a “long-line launch” if you’re having trouble. Roll out about 50 feet of string from your kite and walk back until the line is as straight as possible, according to Jim Nicholls’ 1,508th kite video. Then pull the kite up to catch the wind.
If you have a friend to help, you can team up to give your kite a boost. Have the friend hold the kite and spool out string for several feet, making sure it’s straight. As you hold on to the spool, tell your friend to throw the kite straight up in the air. If there’s enough wind, the kite will take flight. Make sure you pull the line as your friend lets go.
Keep Your Kite Airborne🪁
If you see the kite swooping in different directions and feel it tugging your string, it’s time to pay out the line. If you let the string out too much, its weight will actually begin pulling the kite down. Your kite may begin an unsteady descent until you pull back on the string with one hand, which should boost its stability again.
Sometimes, even if you think everything looks great in the air, you may notice that the kite feels a little sluggish and the line is sagging. Now you want to pull the string gently downward with one hand. Pulling on the string causes the kite to speed up slightly and enhances lift, so that you should see the kite rising again. The trick to keep the kite riding the wind is to make sure you maintain tension in the string and correct for changes in wind speed. As long as the line from your spool to your kite is taut, you can be reasonably sure the kite will stay up.
What If There’s No Wind? 🪁
If it’s not windy, you can manufacture your own kite flying forces by holding up your kite by the frame with one hand as you jog. Then let go and start paying out the line a bit. You may need to keep running in circles until your kite catches an updraft. Outdoor Boys on YouTube posted a creative solution to flying a kite in no wind—take it for a trip on a motorboat! Most of the time, a no-wind situation isn’t ideal if you’d like to see your kite climb to lofty heights.
Bring Your Kite Back to Earth 🪁
If you’re using a standard spool, simply begin rolling it in, hand over hand, until the kite lowers to your level, Maxa advises. The other way is to drop the spool and pull the string gently and steadily, hand over hand, until you can retrieve your kite. If your string is wound around a handle, which is common on children’s kites, begin winding up the string around the handle for the same result.
What Are Kites Made Of? 🪁
Any light material stretched across a rigid frame of plastic, light metal, or wood will do. Paper, plastic or a lightweight fabric all ensure that the kite is light enough to take off. You can even construct a kite from house wrap.
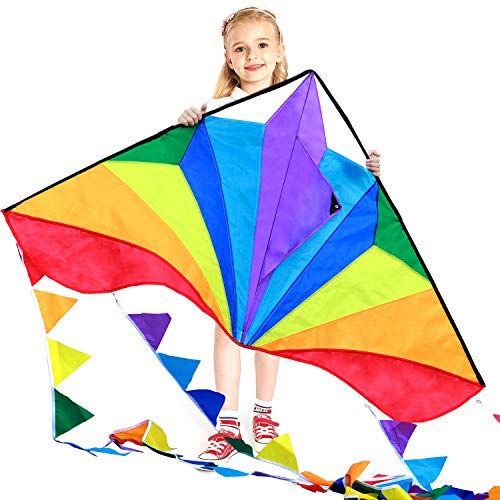
Kites come in all kinds of creative shapes, but one of the best designs for a beginner is the delta shape, similar to the streamlined, triangular stealth bomber, with its pointed nose and swept-back sides. This shape cuts through the air efficiently and is easier to control. Diamond-shaped kites have the same benefits. Parafoil kites may be even more desirable, since they have no frame to break if your kite adventure keeps ending in a crash.
However, there’s no such thing as “kite material,” according to the American Kiteflyers Association. “You can use anything to build a kite,” writes Steve Ferrel, who had been judging kites for 20 years by the time he wrote this article in Kiting Magazine in 2010. He goes on to list a plethora of materials, including bed sheets, tree leaves, webbing from woven lawn chairs, various plastics, papers and potato chip bags. “I even saw a flying bra at one festival,” he writes.
Whether you make your own kite or simply buy it, don’t waste any more time. Just go fly a kite!
Before joining Popular Mechanics, Manasee Wagh worked as a newspaper reporter, a science journalist, a tech writer, and a computer engineer. She’s always looking for ways to combine the three greatest joys in her life: science, travel, and food.


