BESTA IKEA Hack: How To DIY This Lilac & Marble Sideboard Storage Cabinet

When modern cabinet hardware brand Plank Hardware challenged me to create an IKEA hack for a social media campaign, I jumped at the chance. I hadn’t done an IKEA hack for a while, and my office was crying out for more storage space. For this hack, I used a basic IKEA BESTÅ storage system carcass with receded doors.

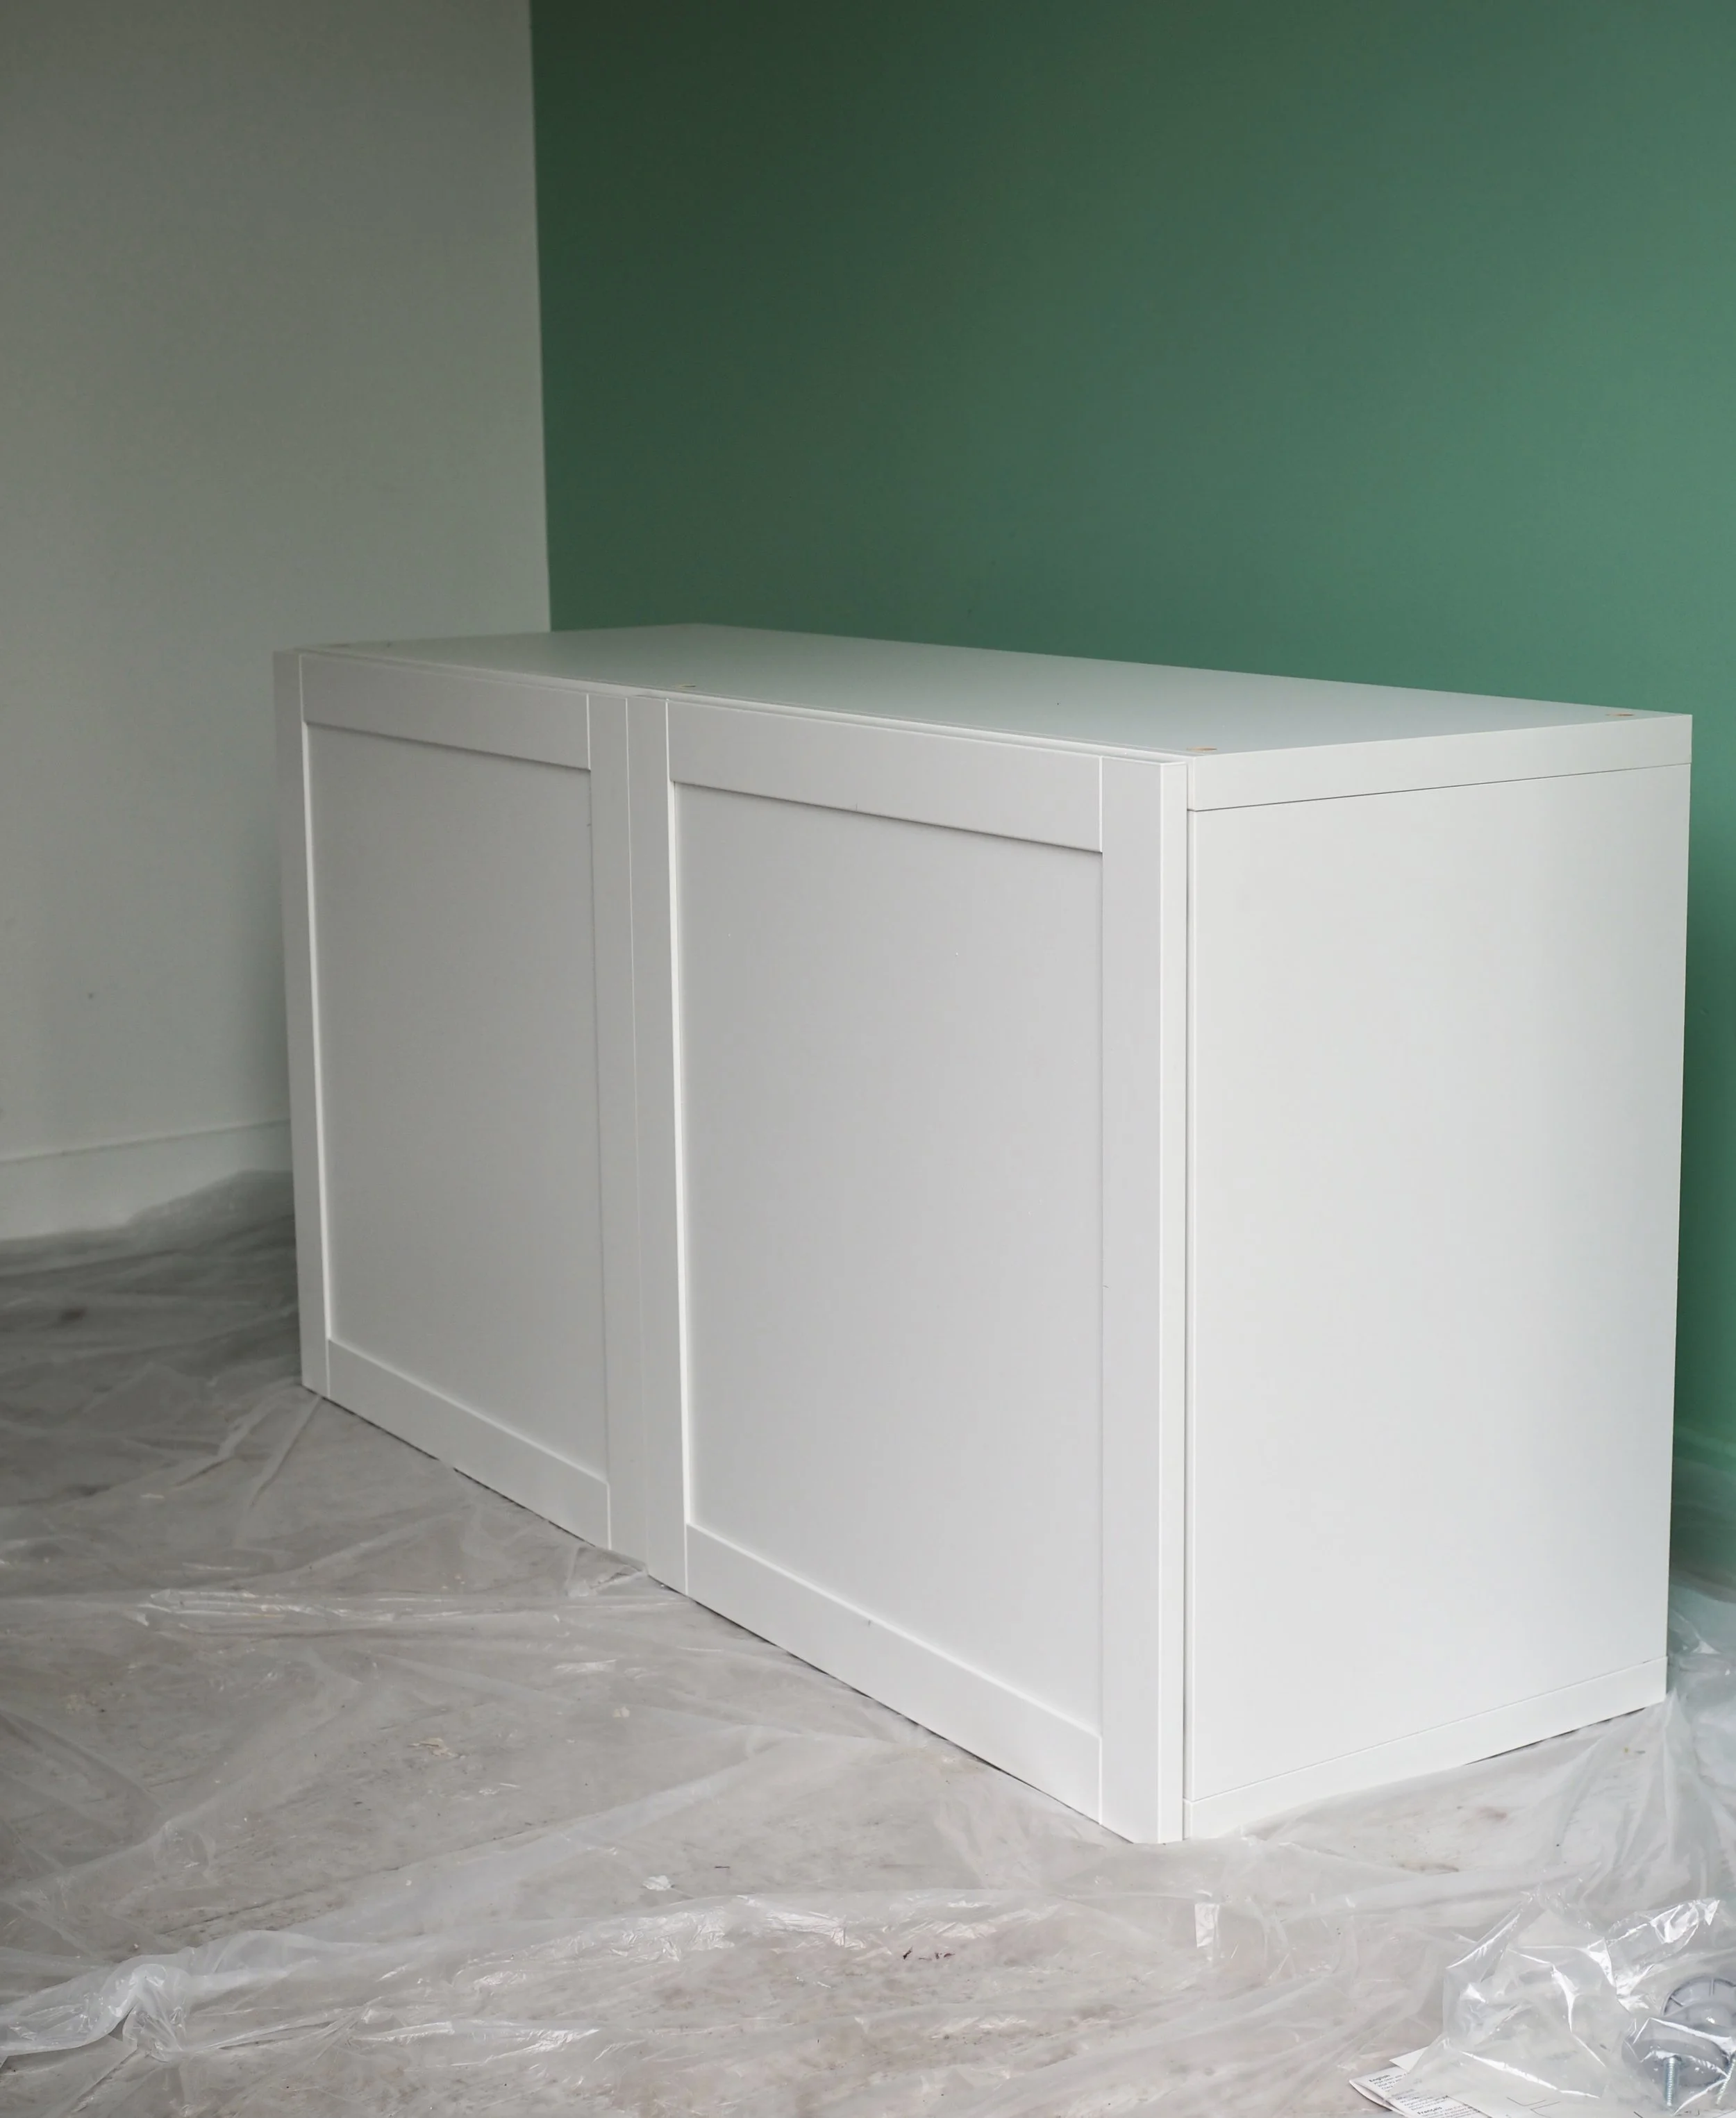
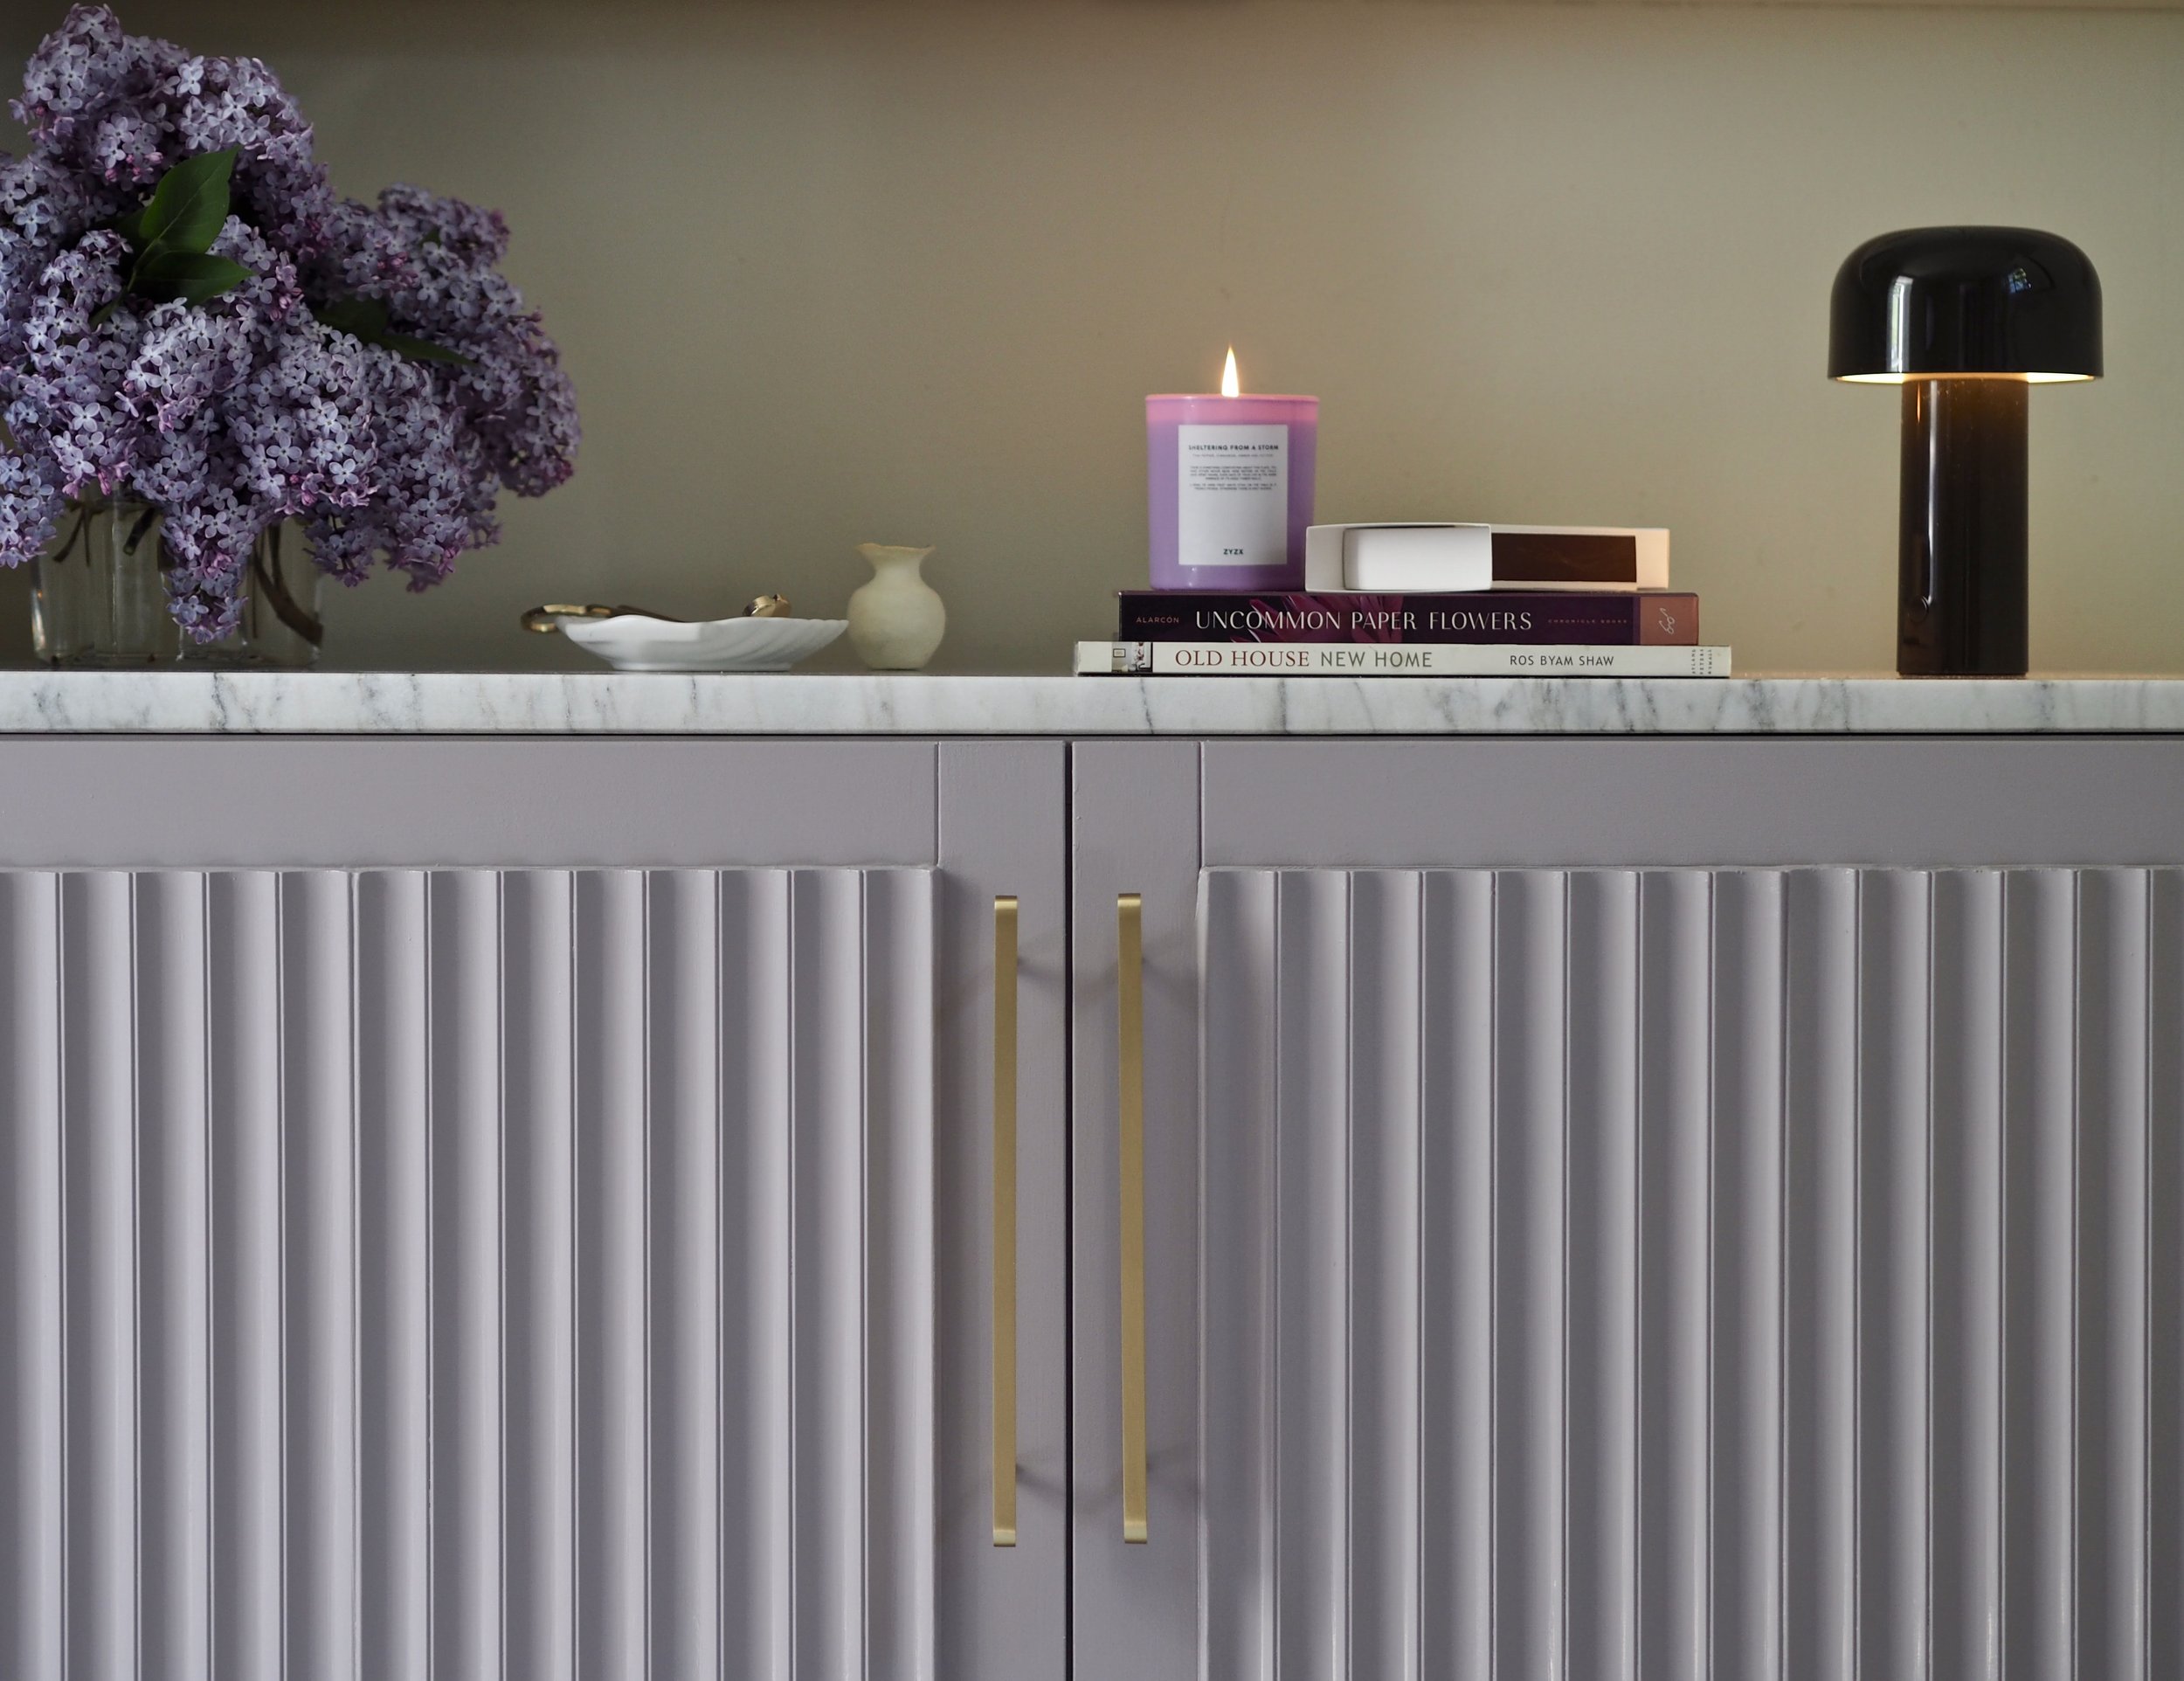
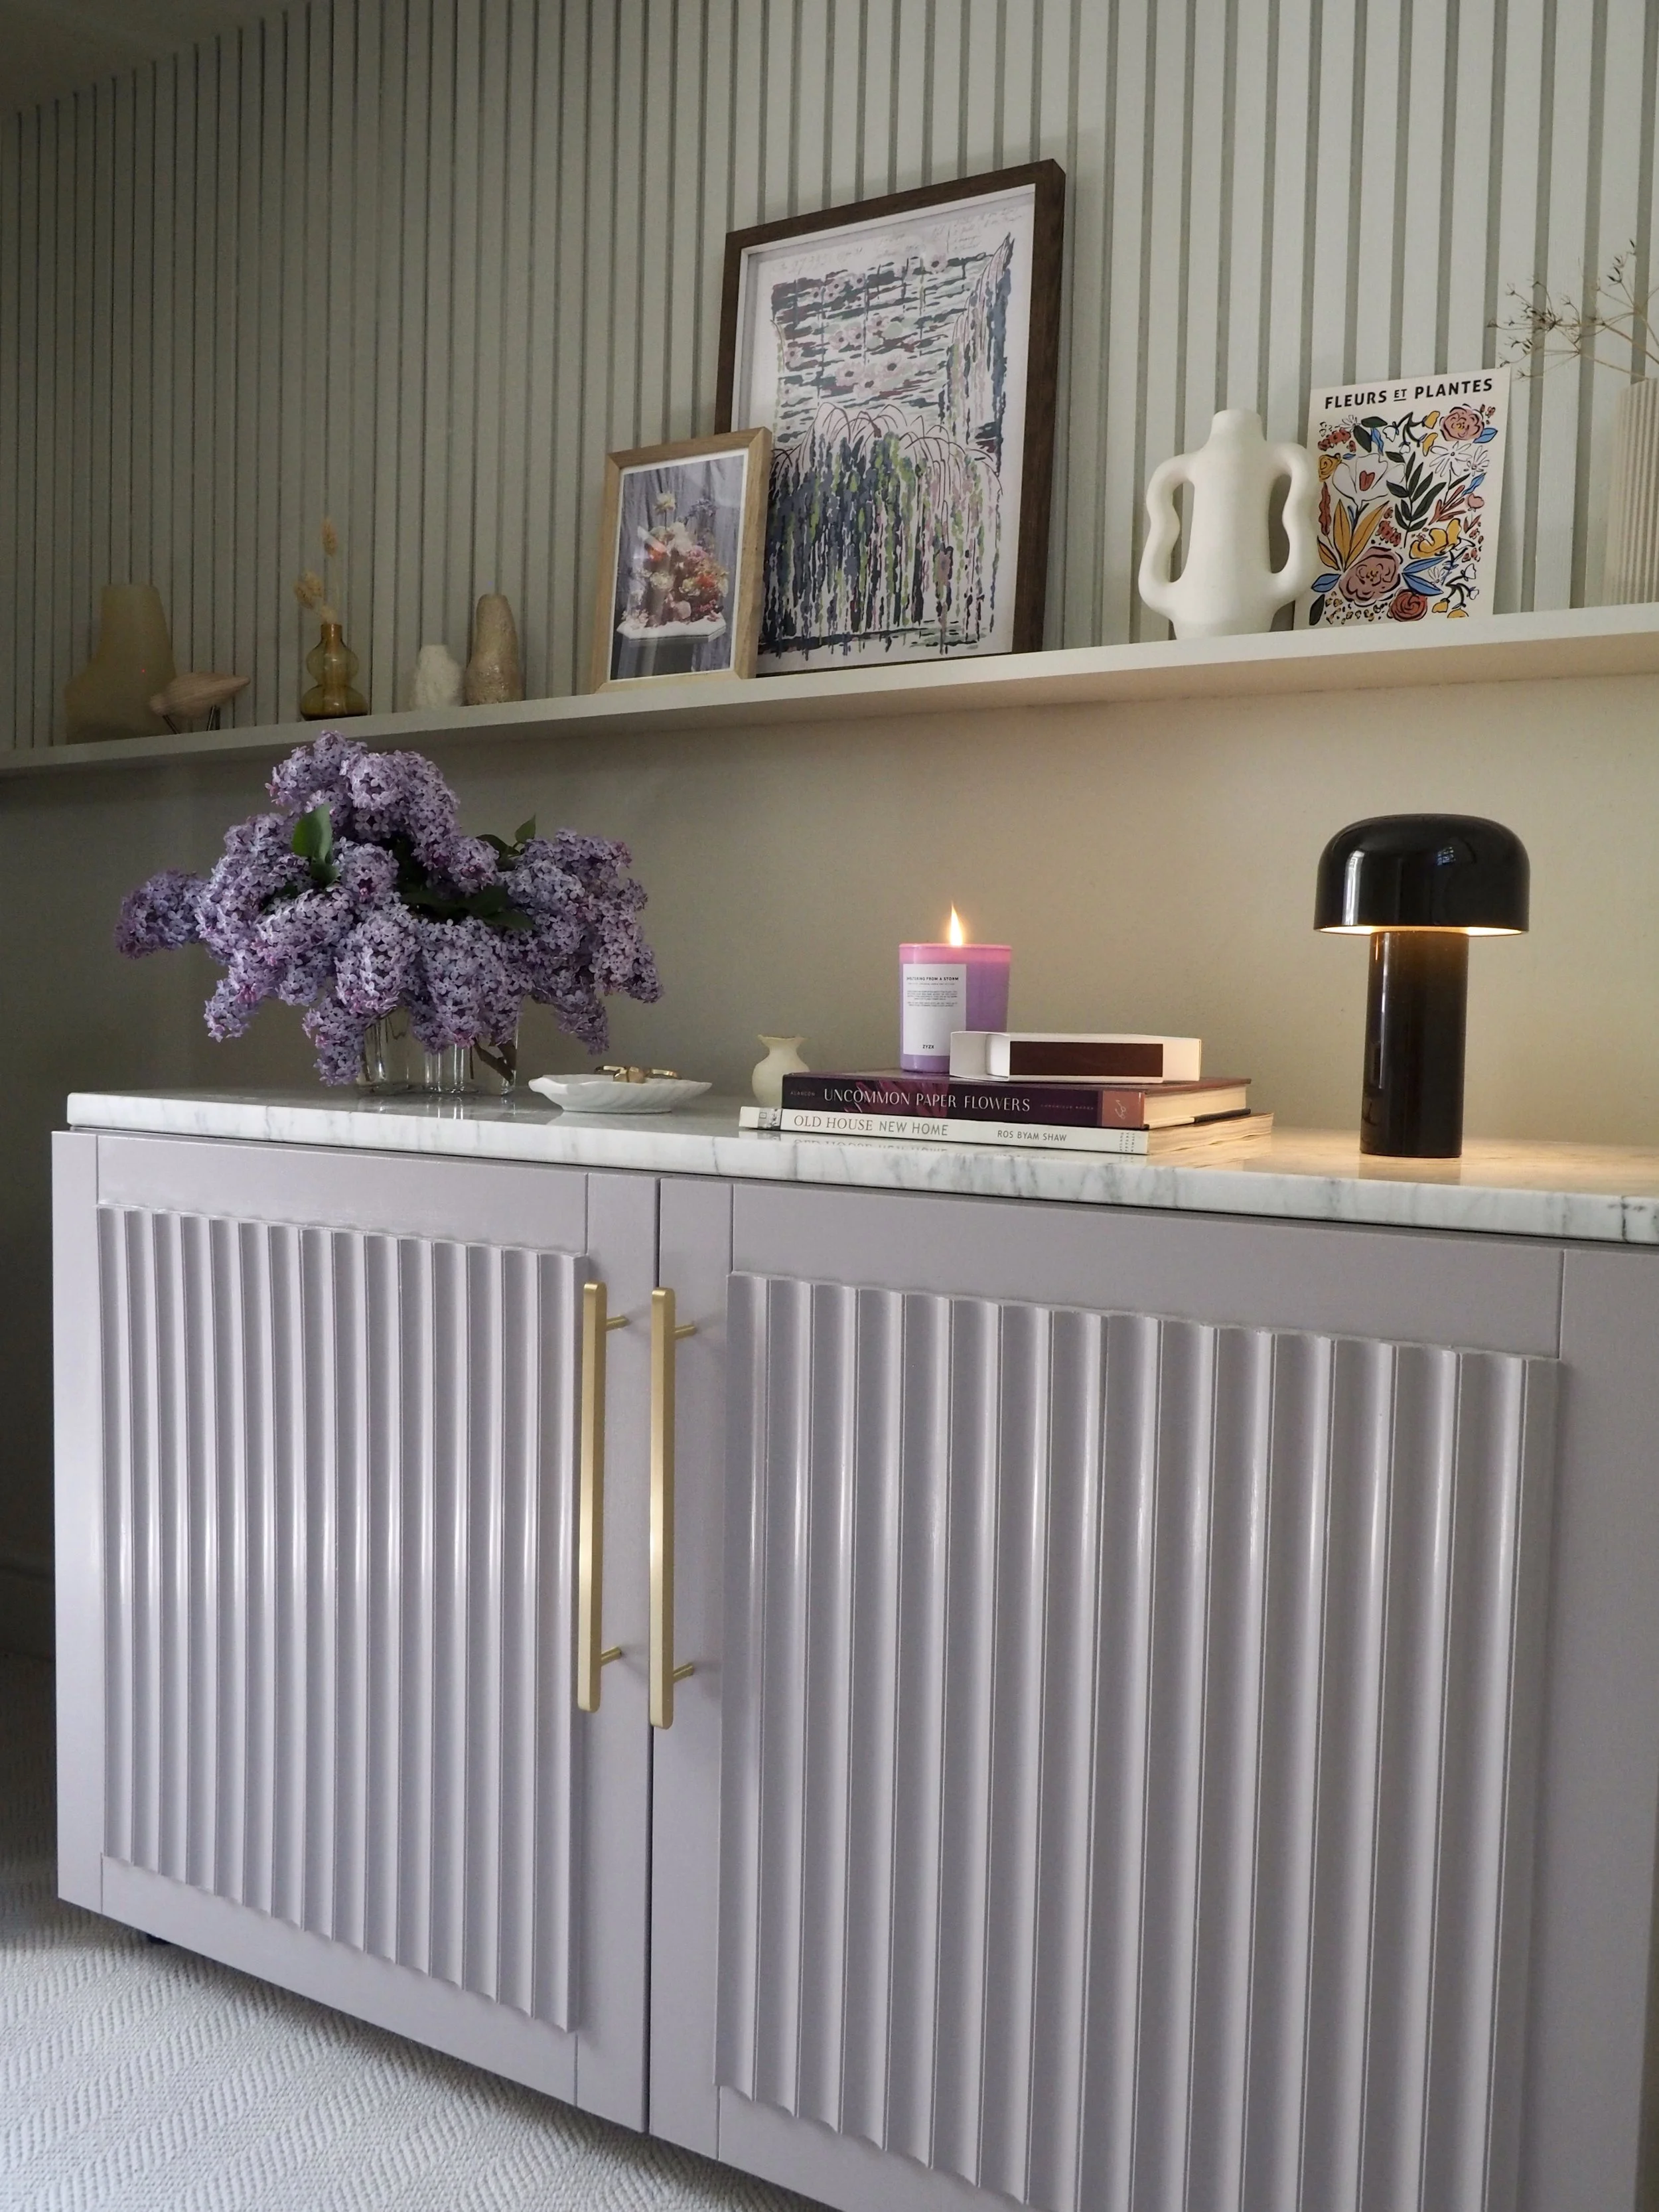
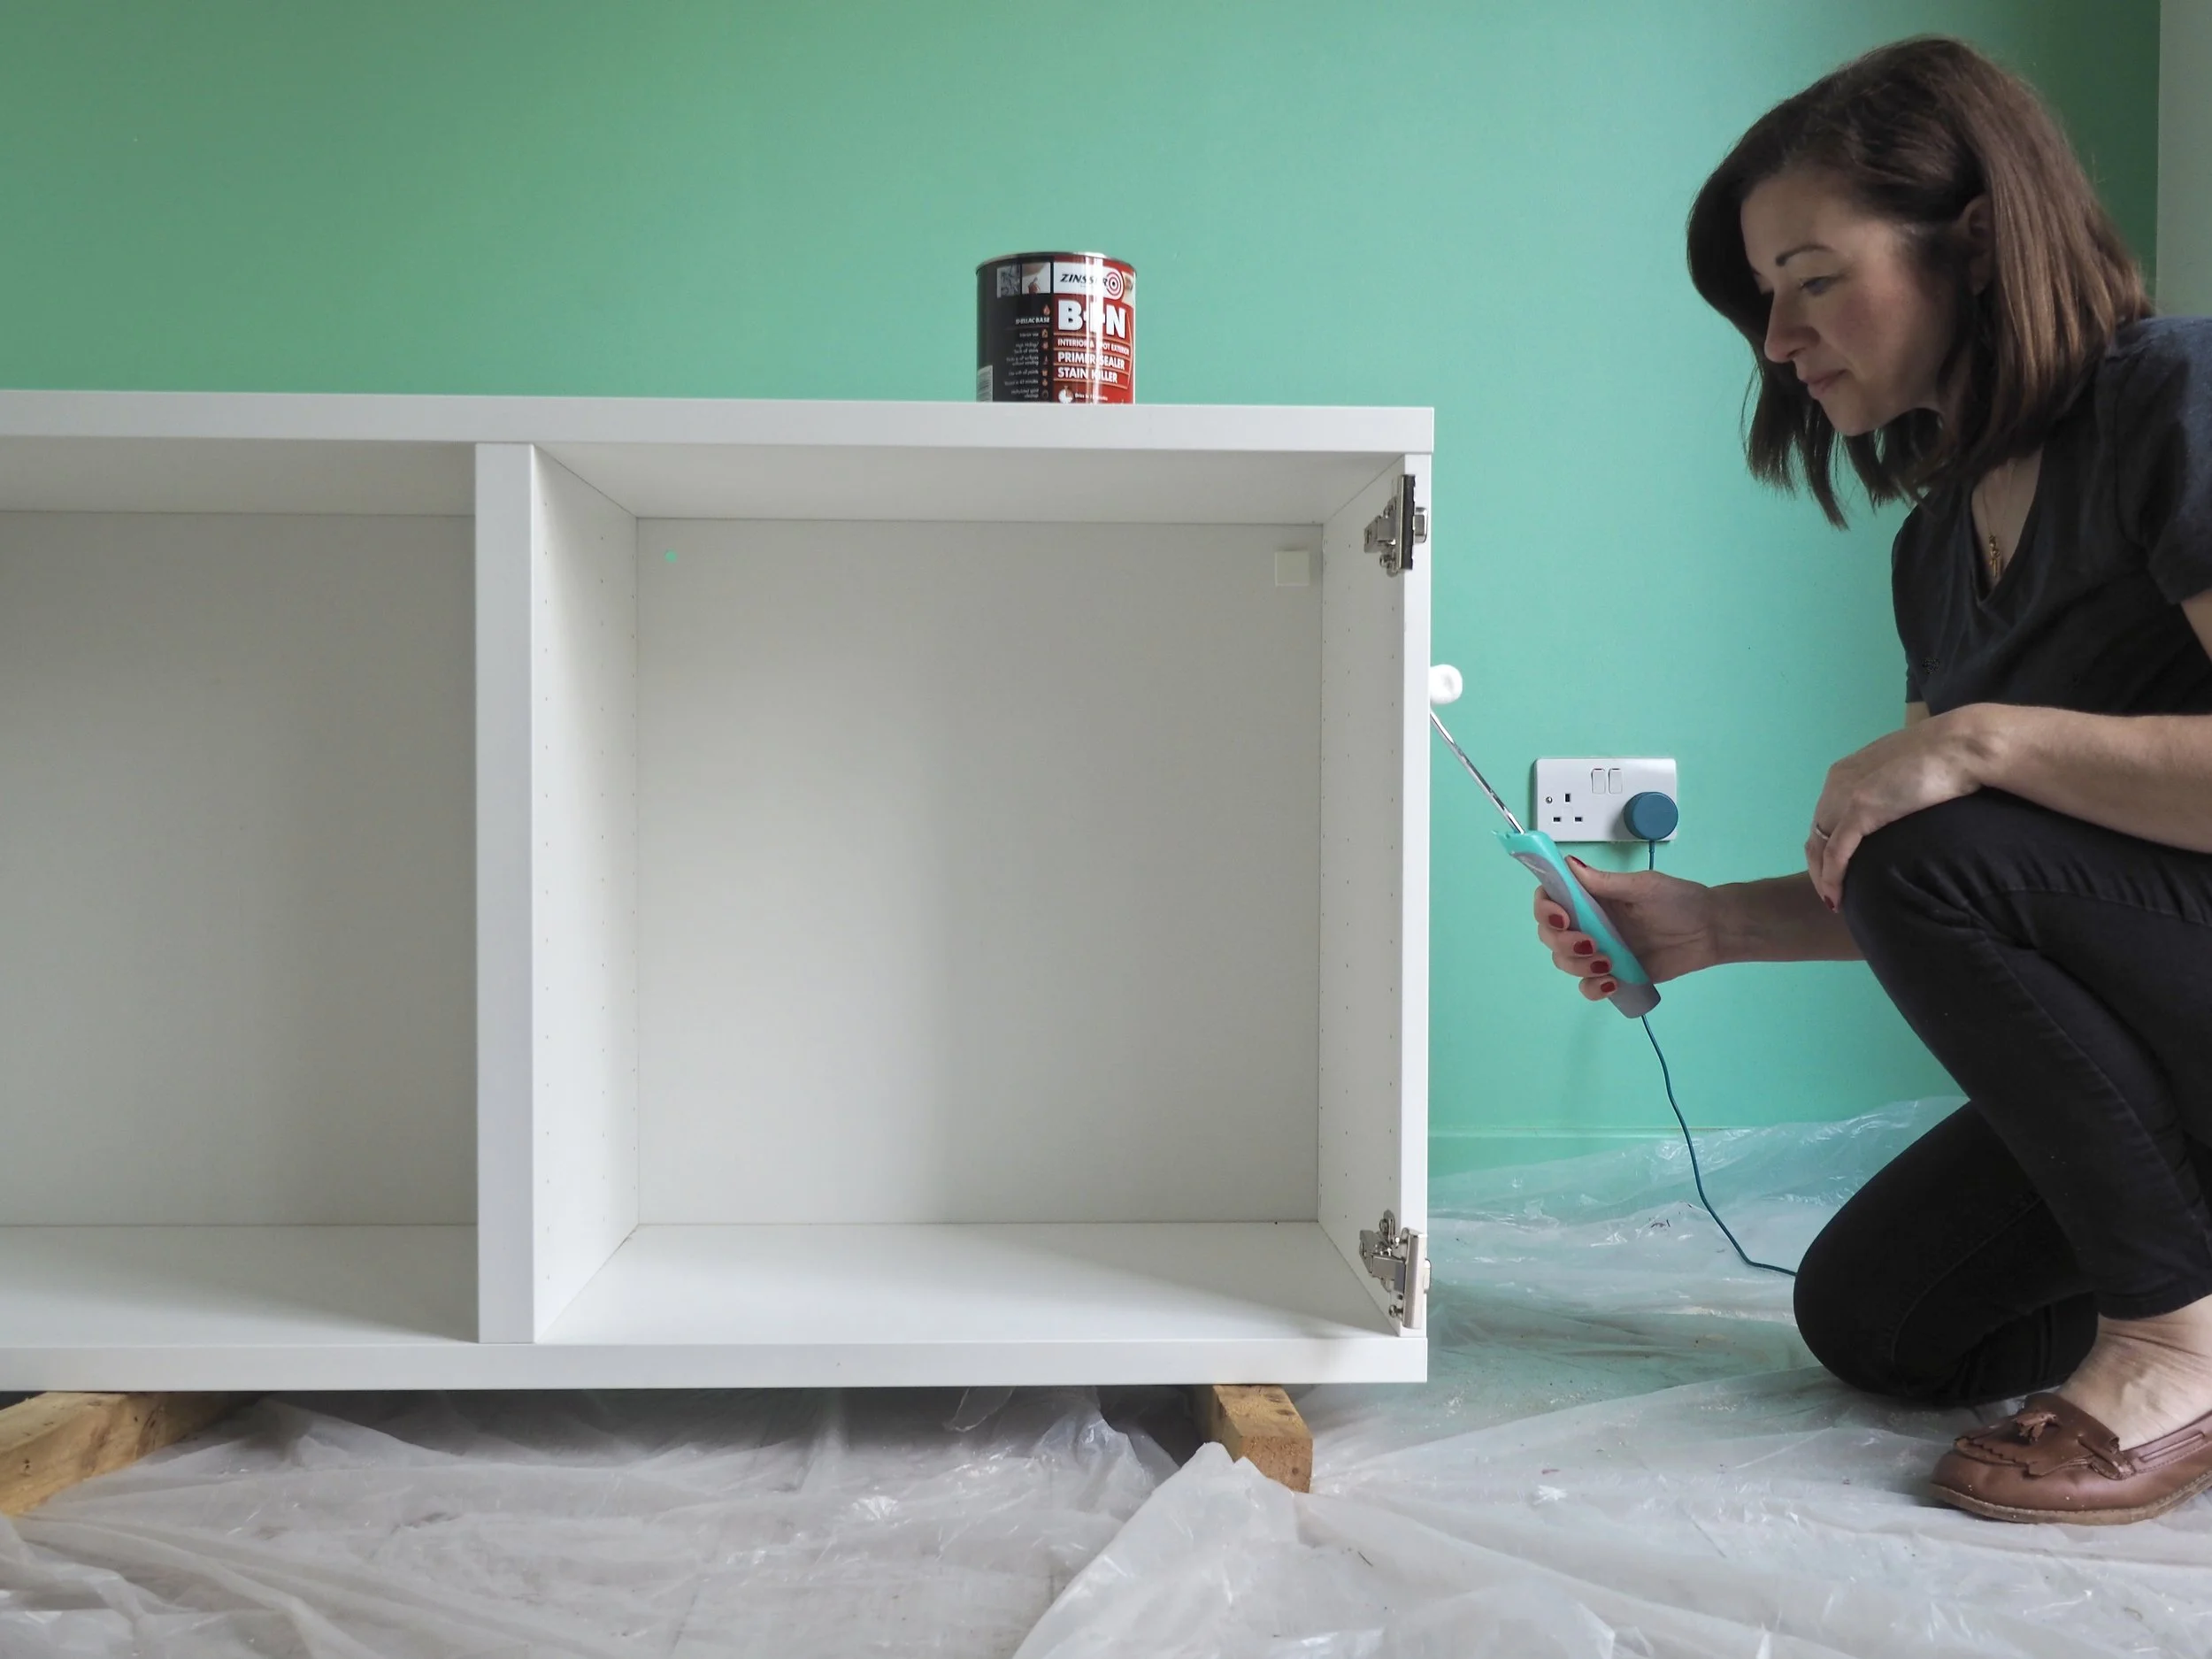
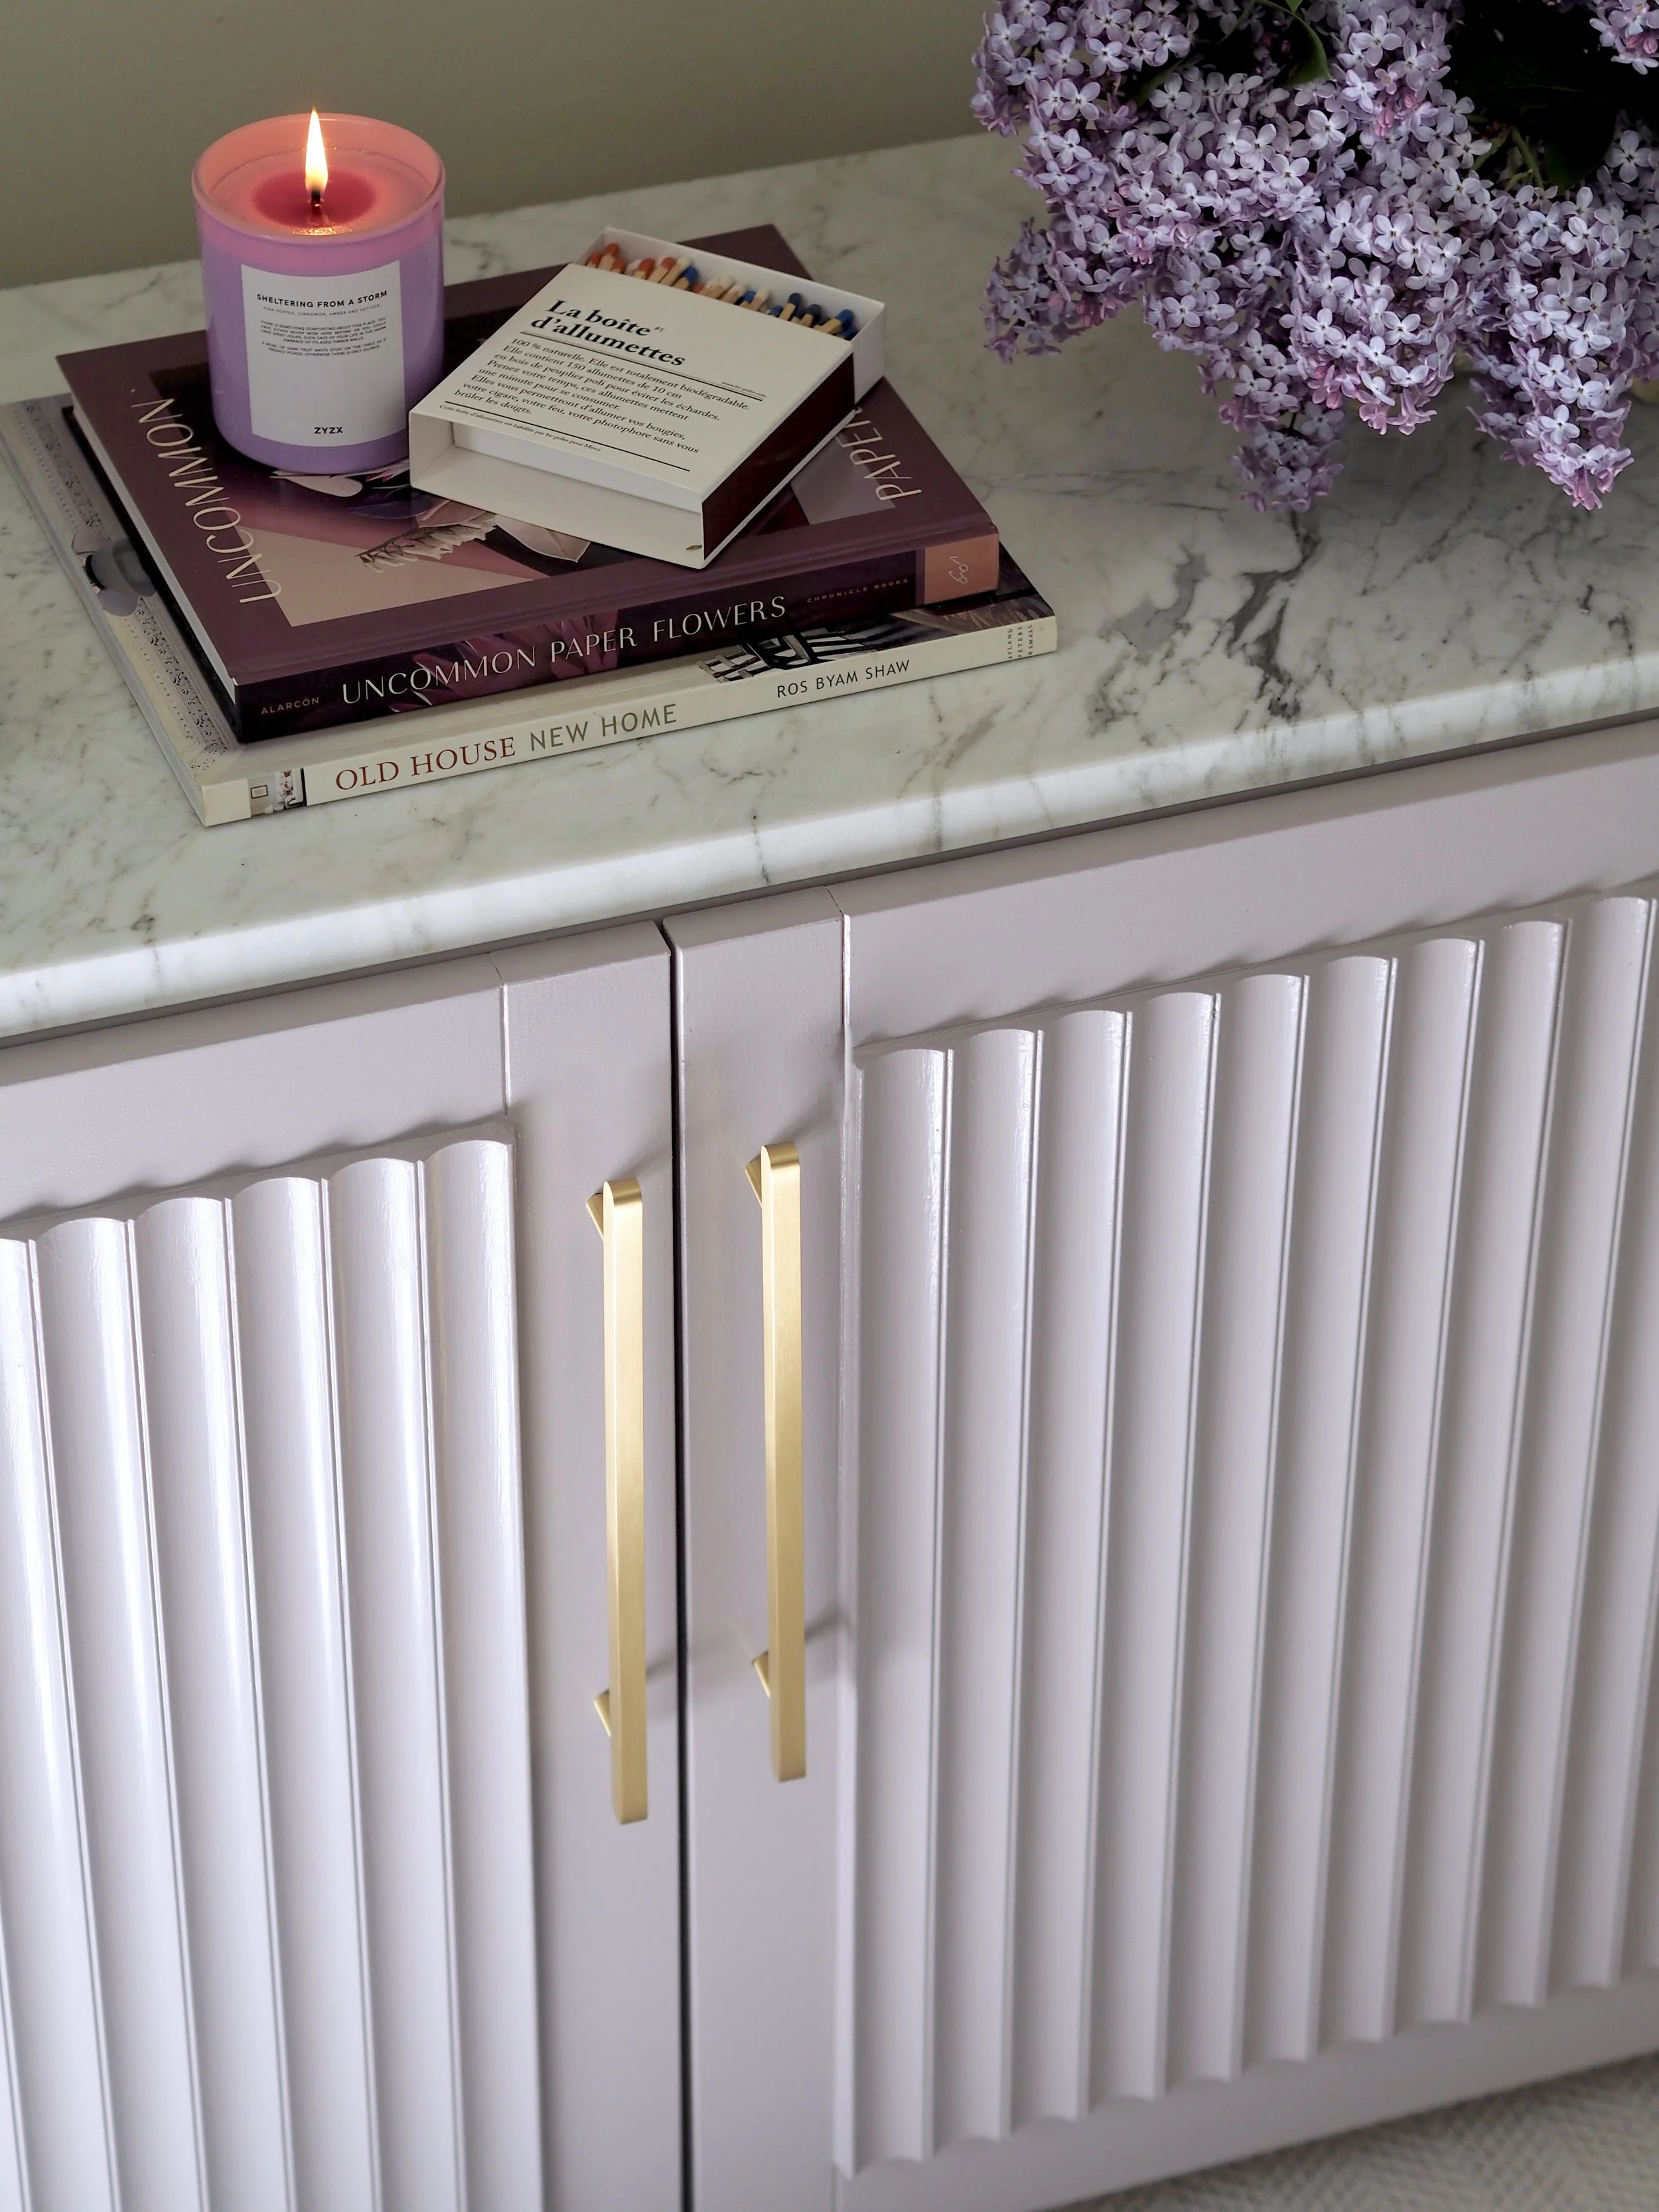
I used a basic BESTA unit with inset doors from IKEA as my base.
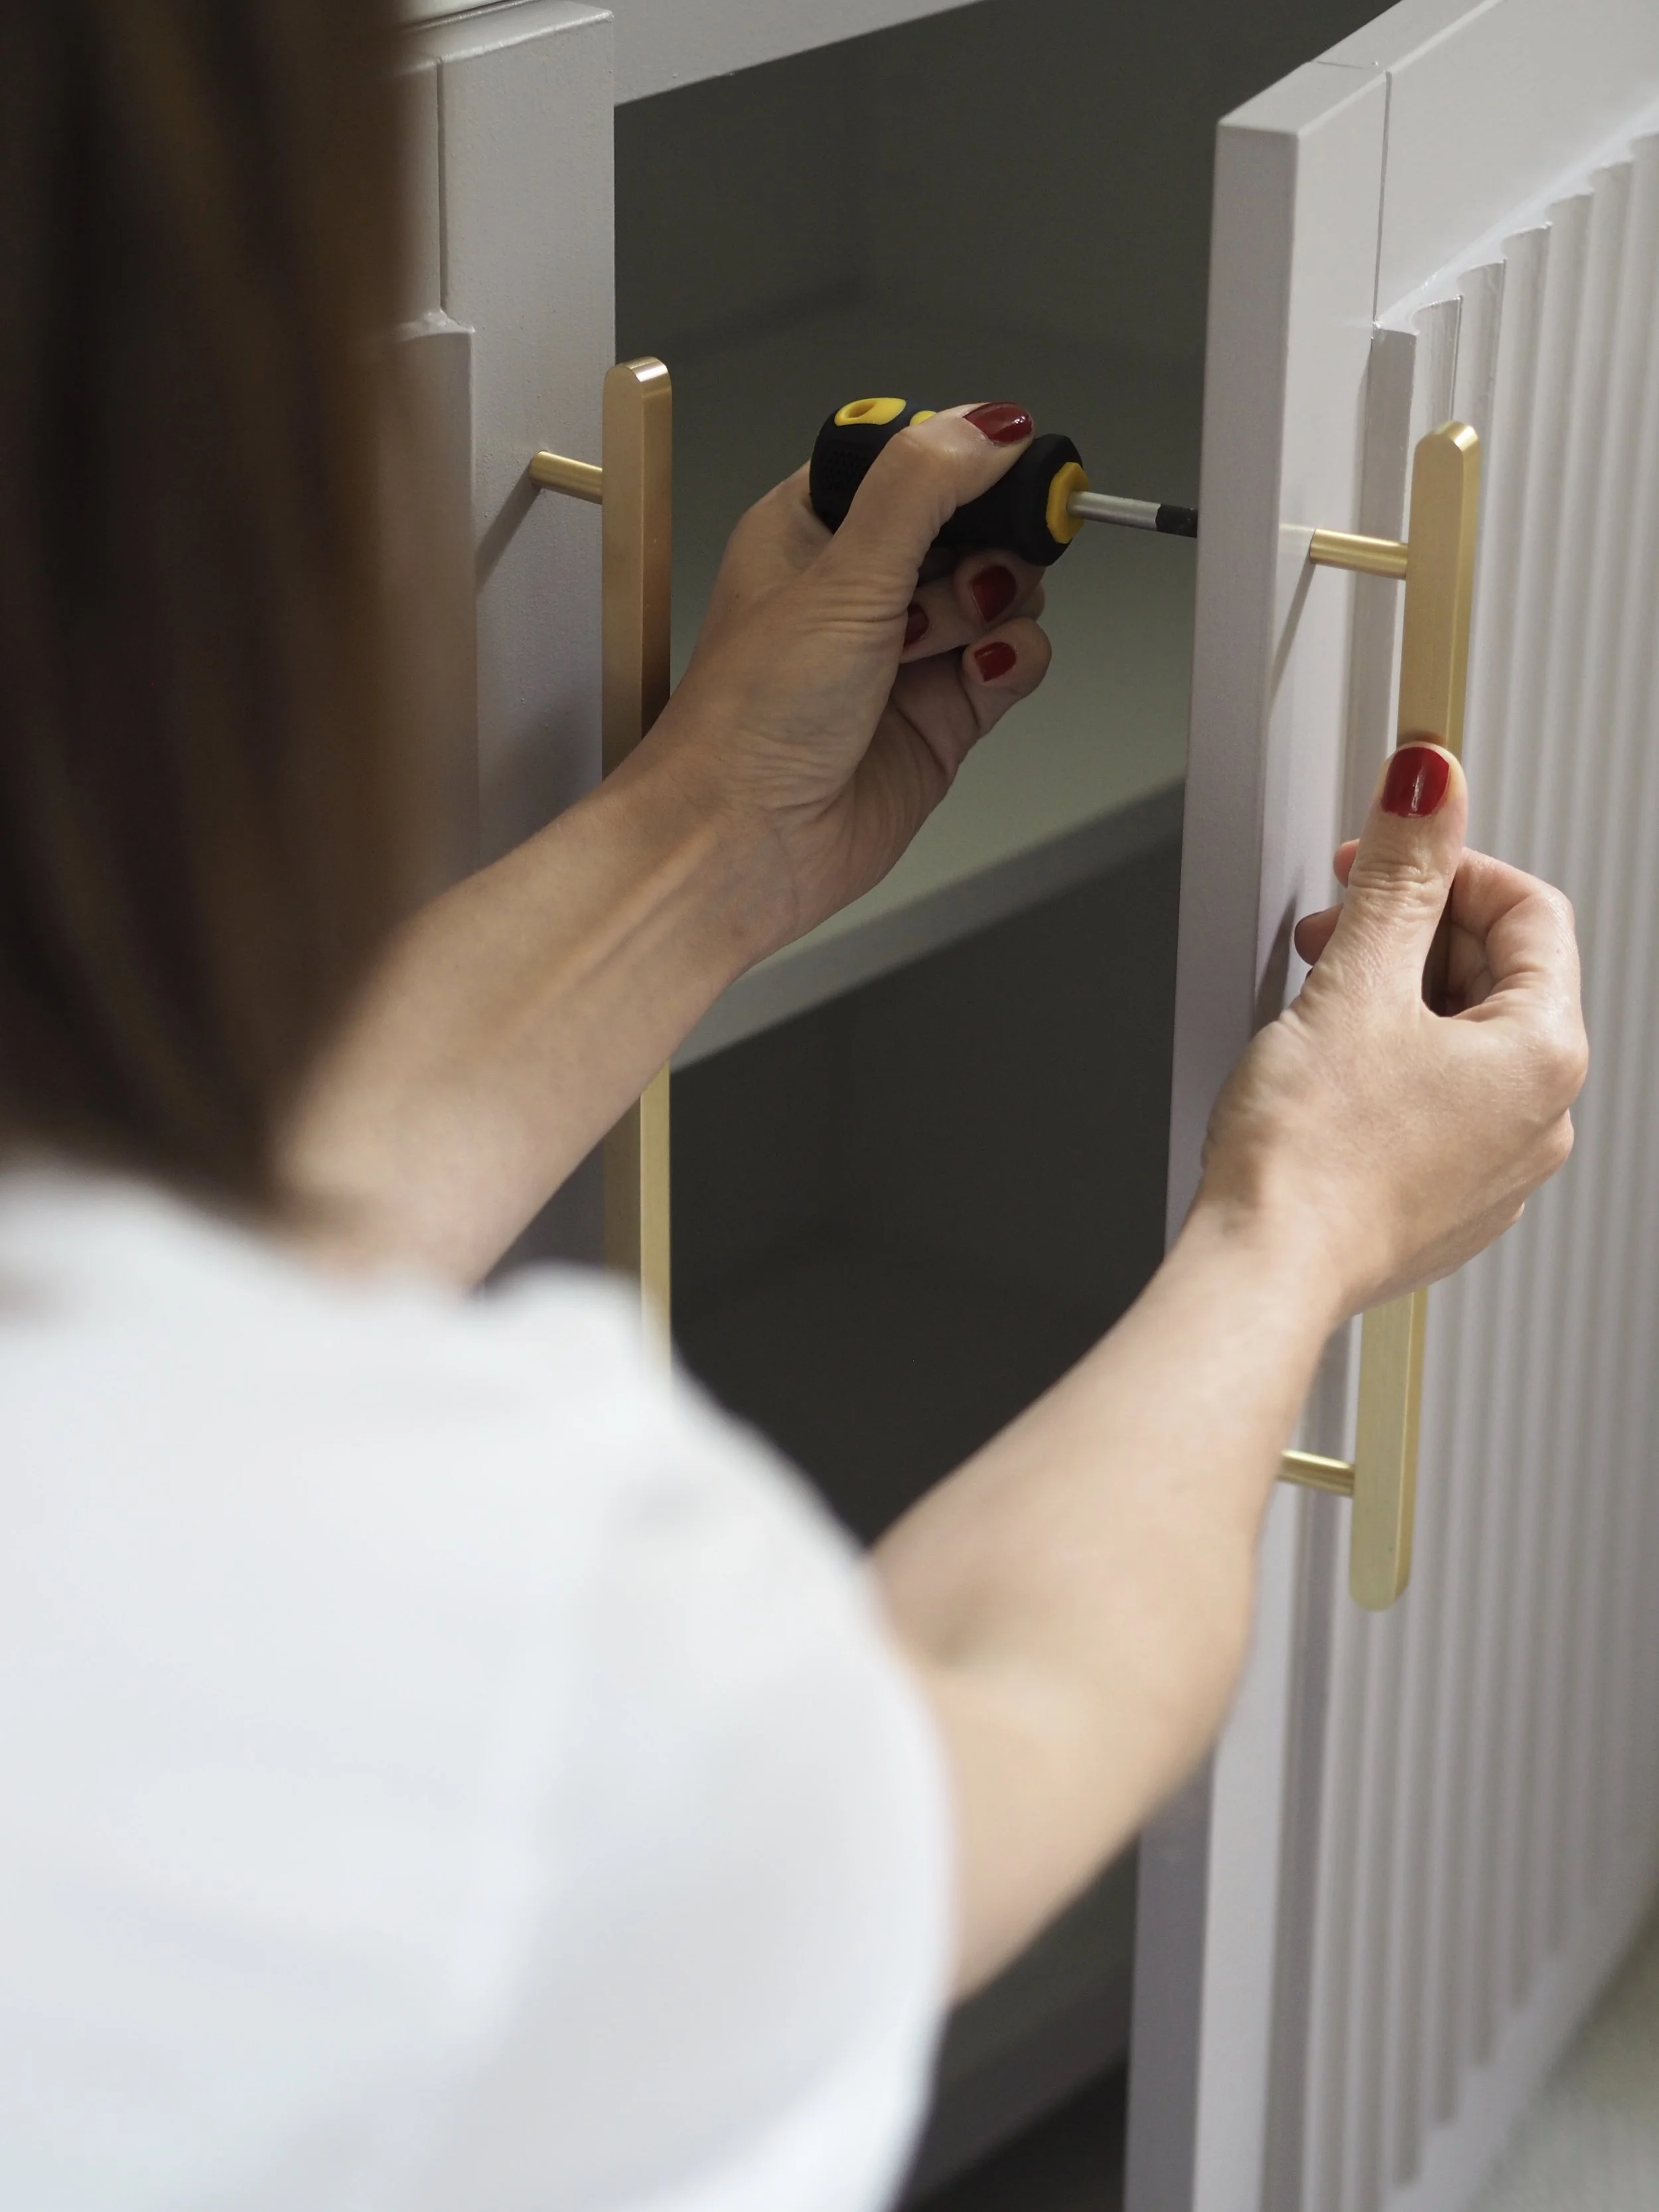
The first step was to drill holes for the long LUDLOW cabinet handles supplied by Plank Hardware. These are a simple screw-on design, so, using an aluminium ruler and a spirit level, I made two central pencil marks in each door and drilled holes for the handles where required.

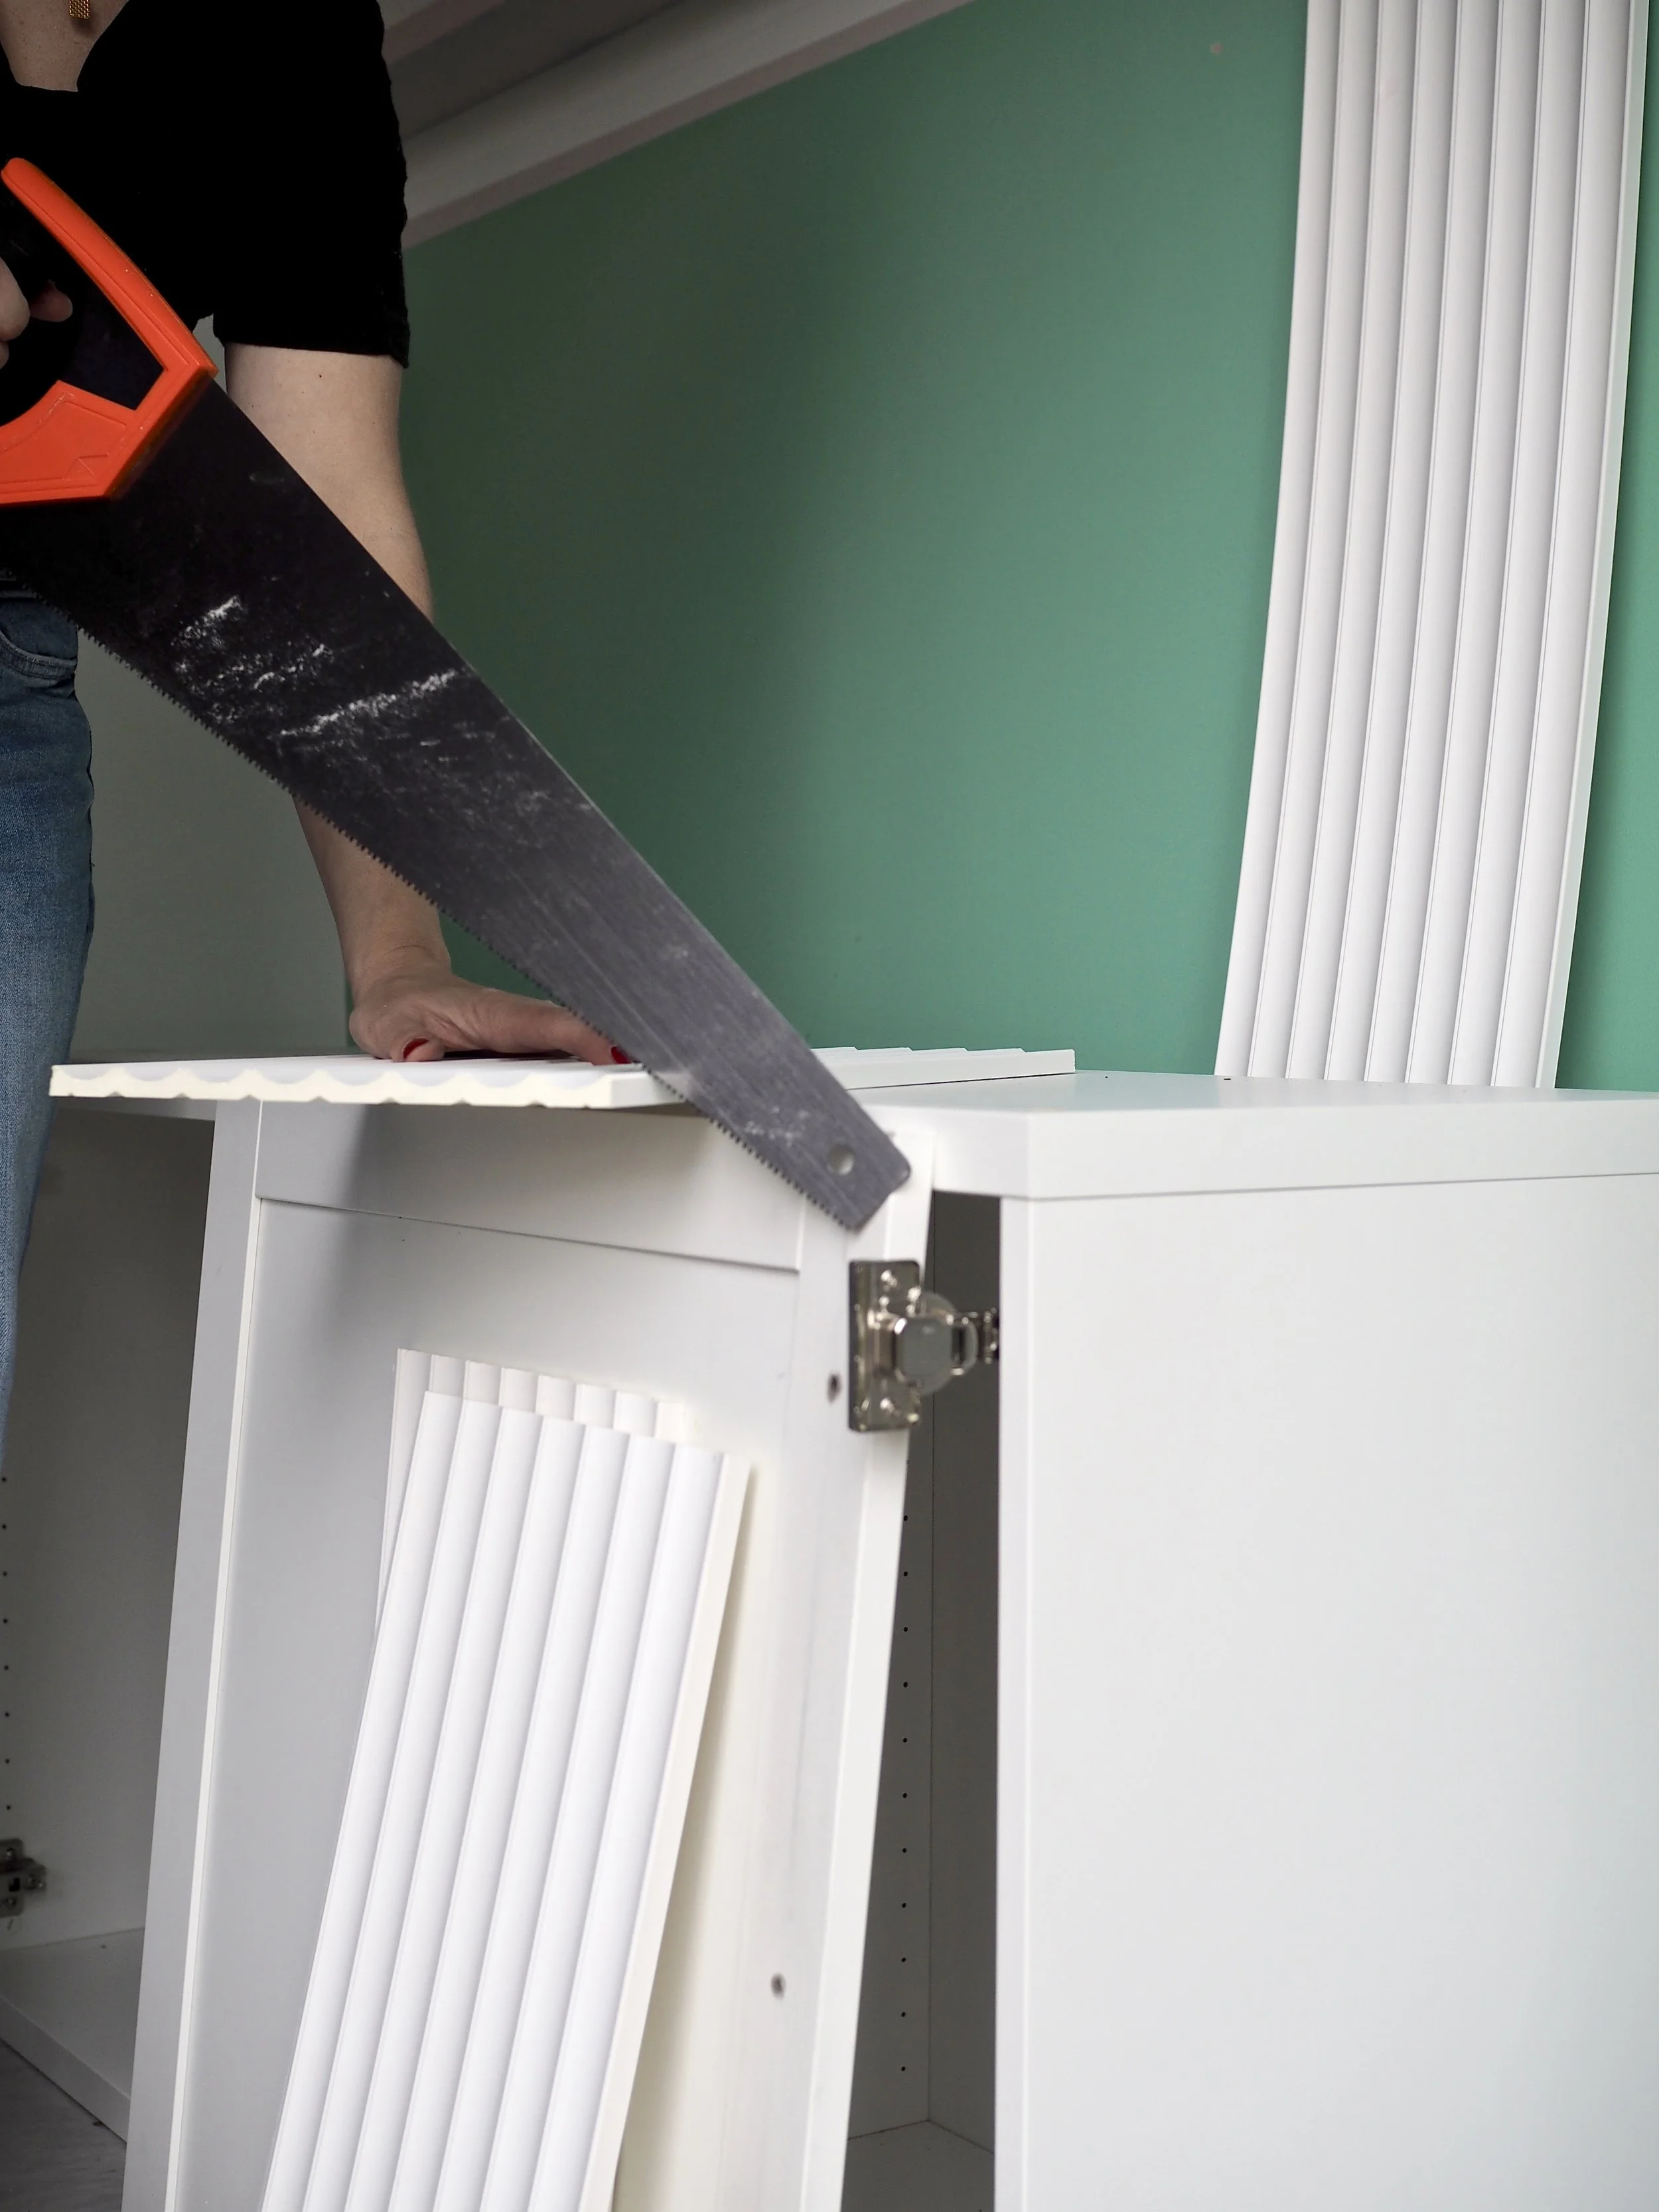
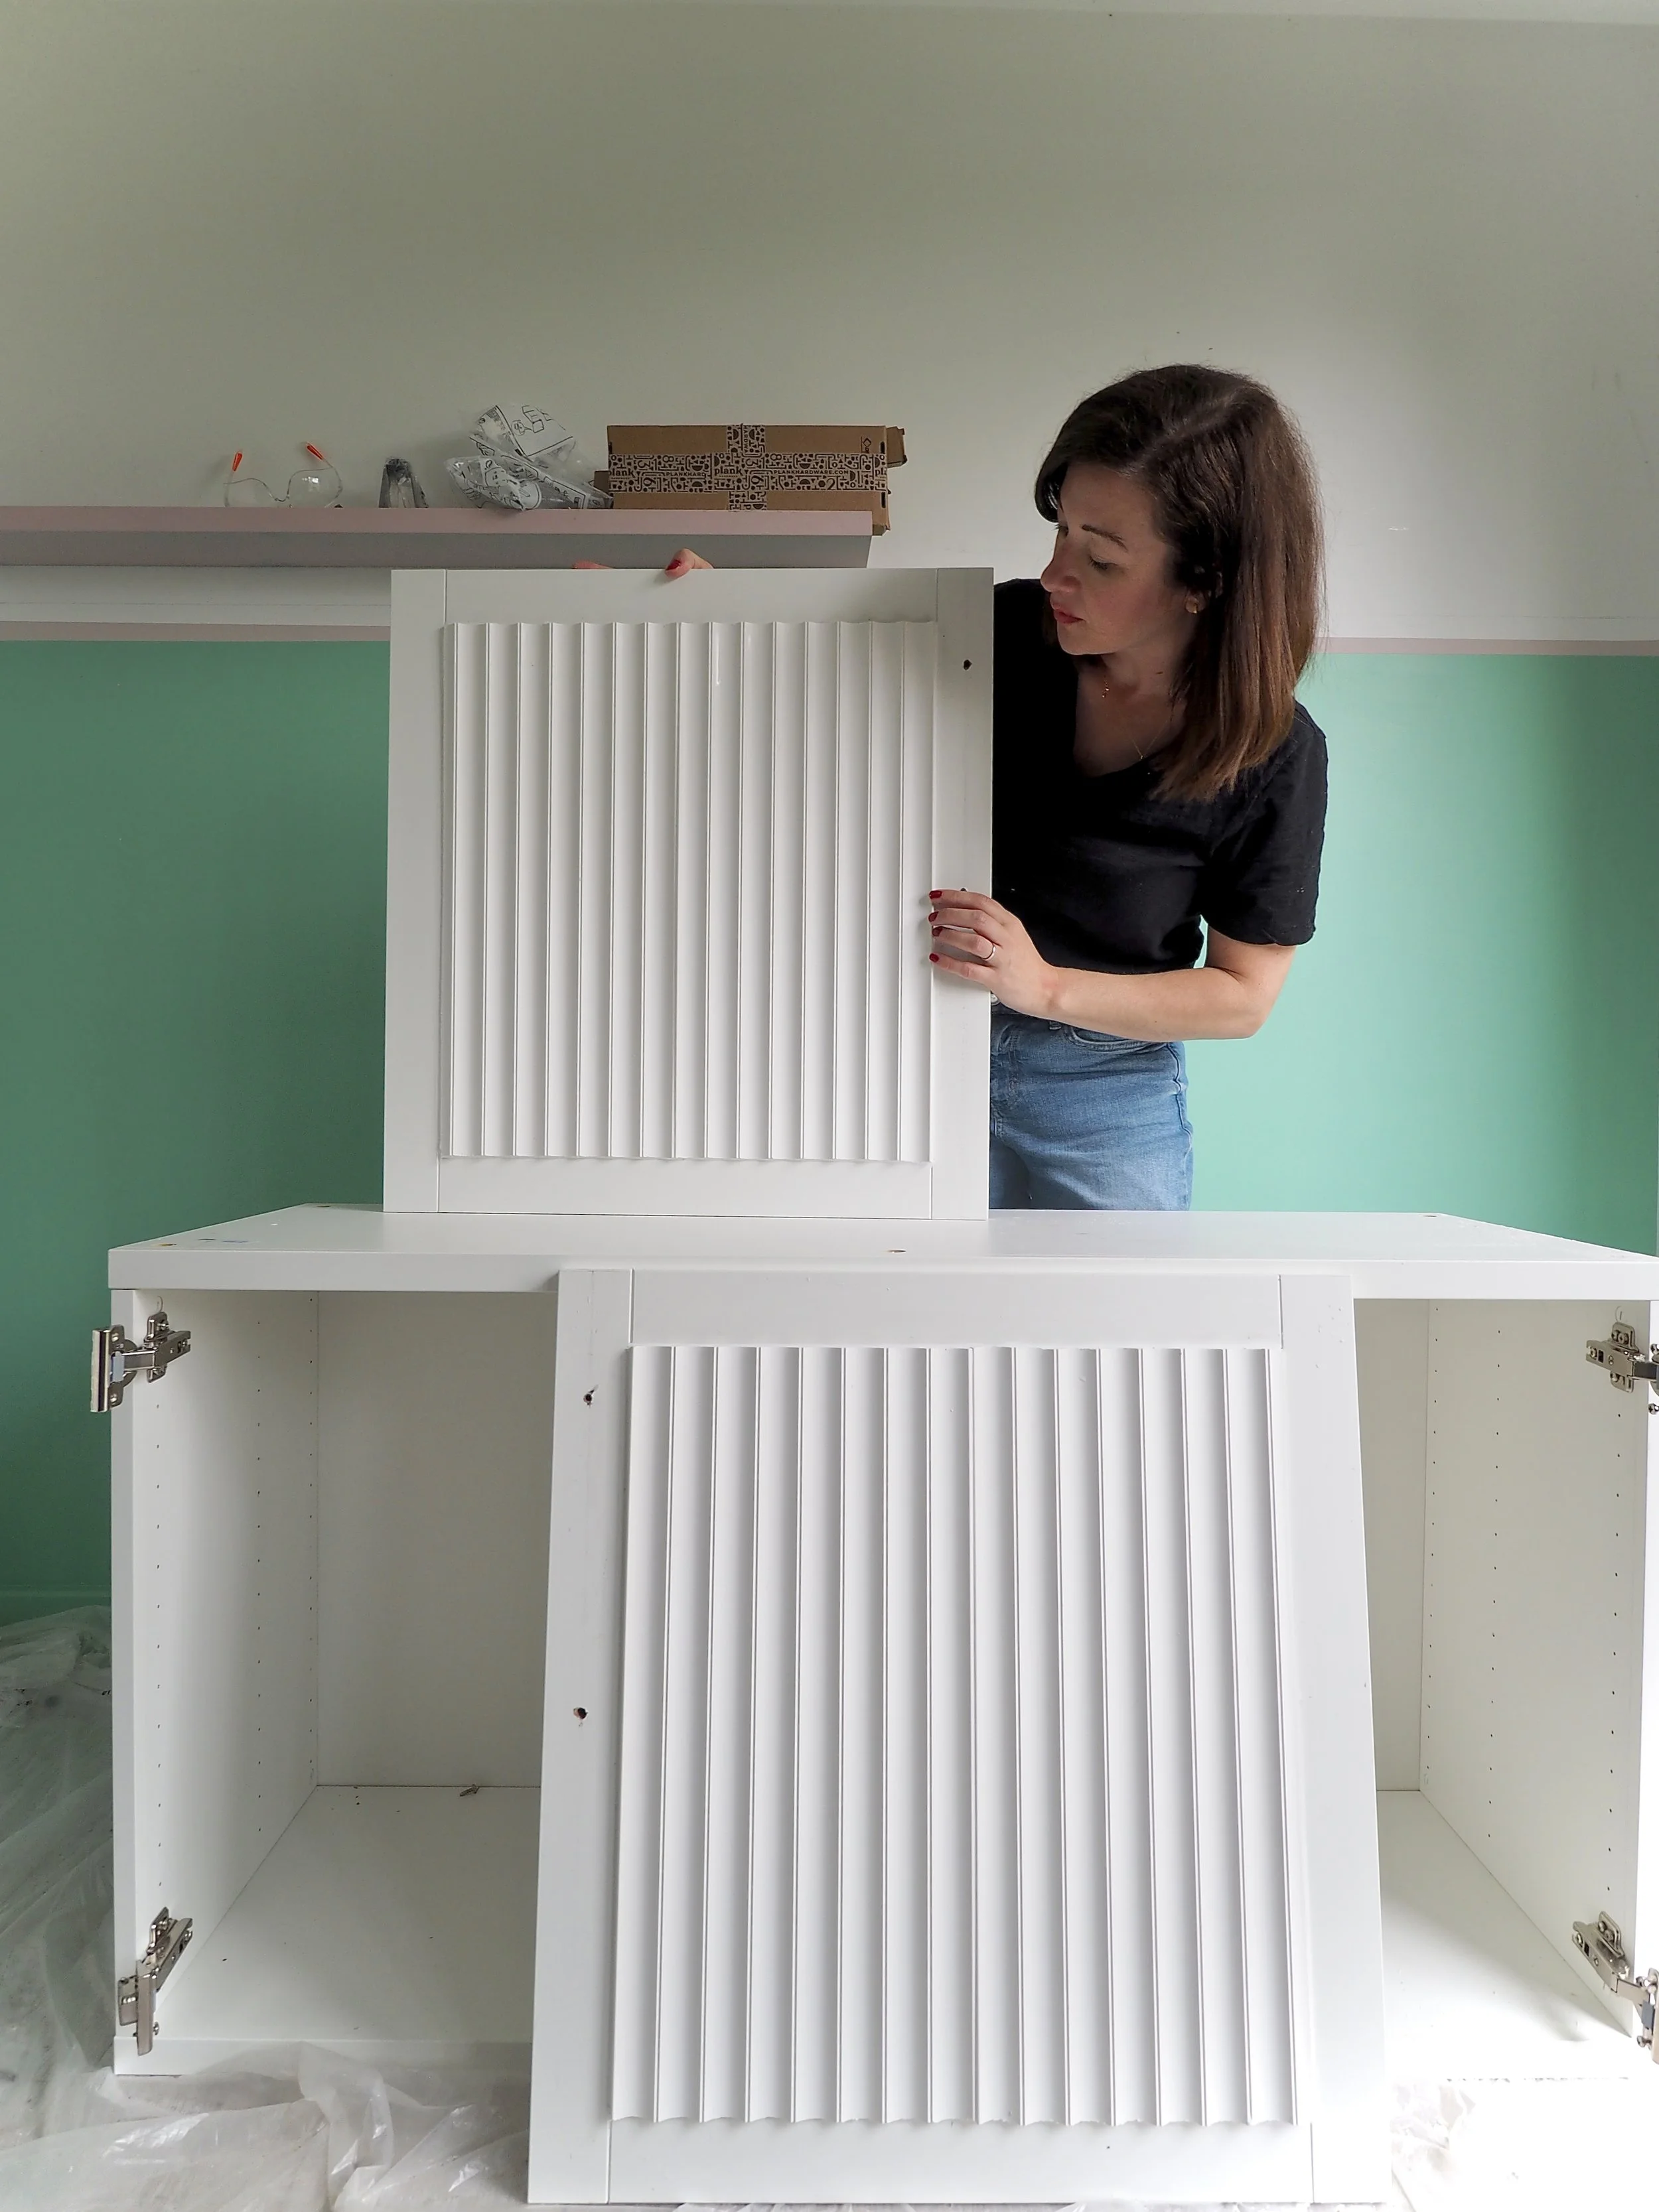
I chose the receded doors from IKEA as I wanted to add some 3D detailing for visual interest; the set square gave me a defined area to apply this texture (while still allowing space for the long handles). I used Orac Decor’s 3D wall panelling for this project as it is lightweight and wouldn’t make the doors top-heavy, plus, it comes in a range of intricate design options. For this project, I chose the wave-like W109 Valley: a reverse design of the fluting that I had applied in my en-suite makeover last year. I simply cut the panels down to size using a manual saw (I required two 200cm length panels for this project, although I had a lot leftover).
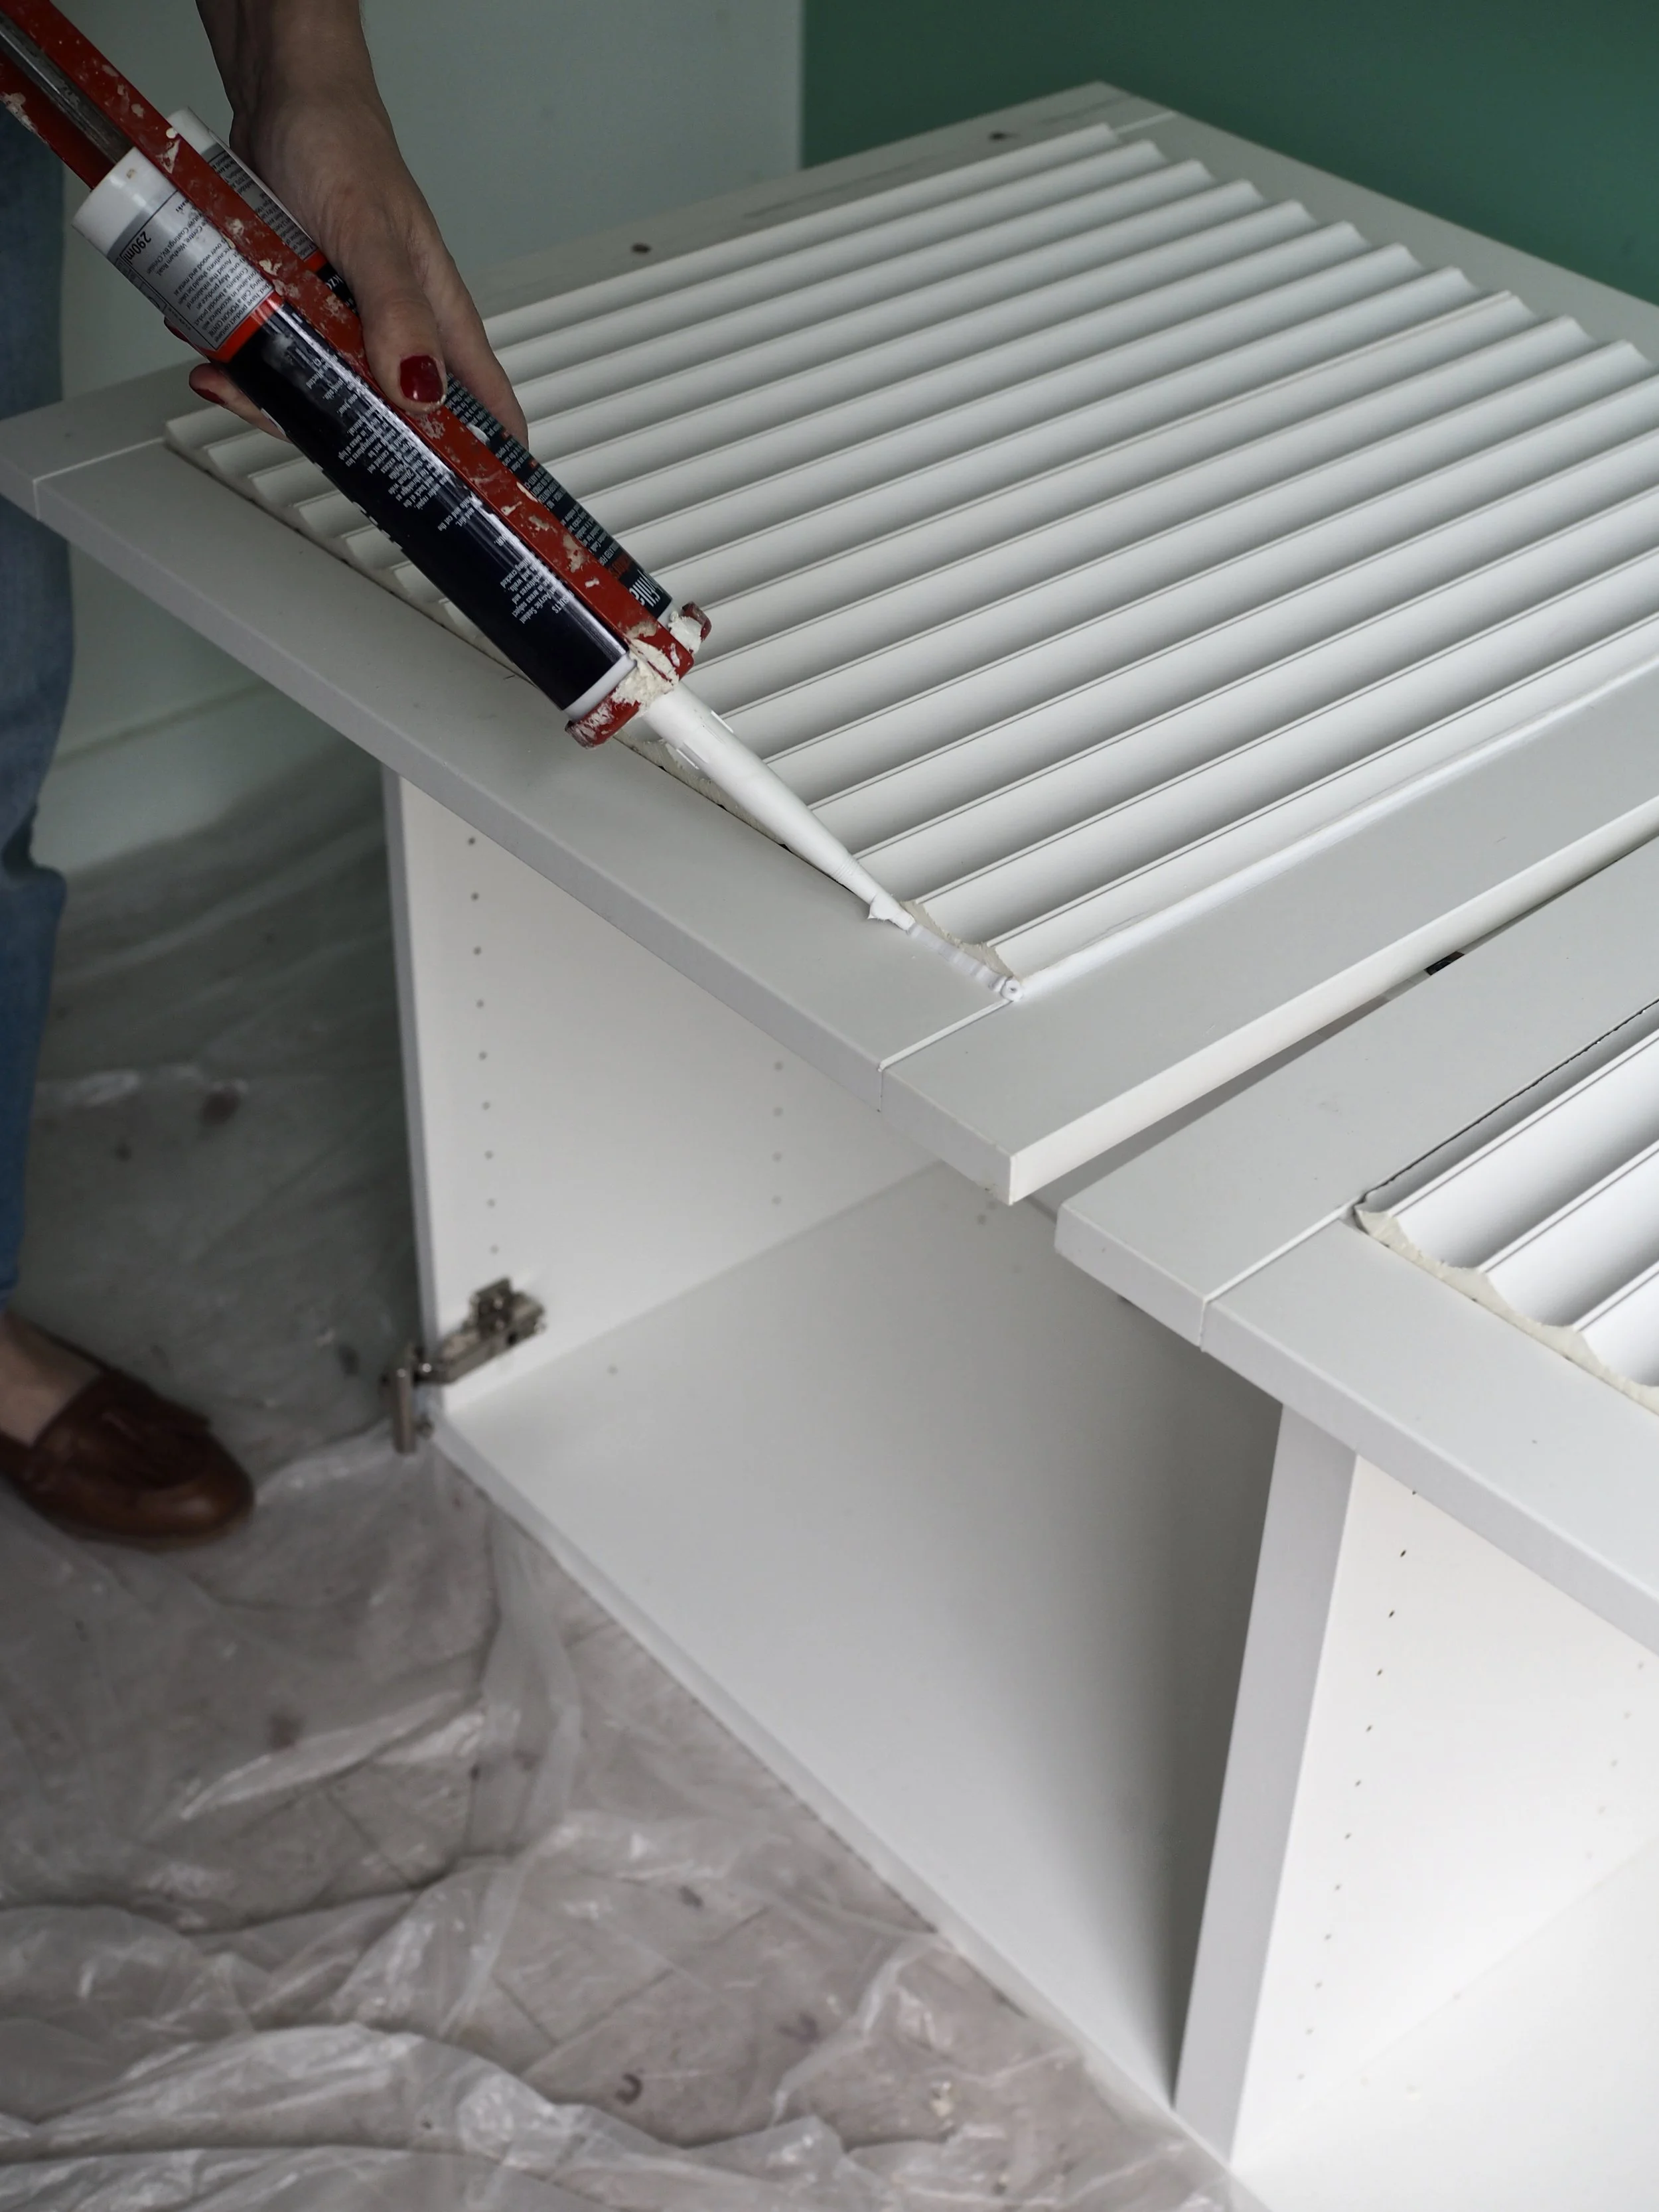
Orac Decor sells their own adhesive for wall application, but as this was a simple furniture flip, I used No More Nails on the reverse of the panels to attach them to the BESTÅ doors.

To finish off the detailing on the doors, I simply caulked all around the square edge and between the joined-up pieces of panel for a smooth and seamless finish with no gaps.
As the BESTÅ has a glossy surface and I wanted to paint it a different colour, I primed the whole unit with Zinsser BIN primer which allows paint to adhere to difficult surfaces without the requirement of sanding. I did two generous coats of primer on both sides of the two doors and the entire outside of the BESTÅ carcass.
After giving the primer adequate time to dry, I painted the unit in Benjamin Moore’s ‘Mauve Desert’ in a semi-gloss (in Aura for woodwork). I really wanted the light to bounce off the 3D detailing and the semi-gloss finish enabled this (I decided against high gloss as there was a very high drying time between application coats). I’d been wanting to try out this colour for a while and I was not disappointed by this lovely lilac shade which, while pretty, avoids being a too sickly ‘ice-cream’ pastel colour.
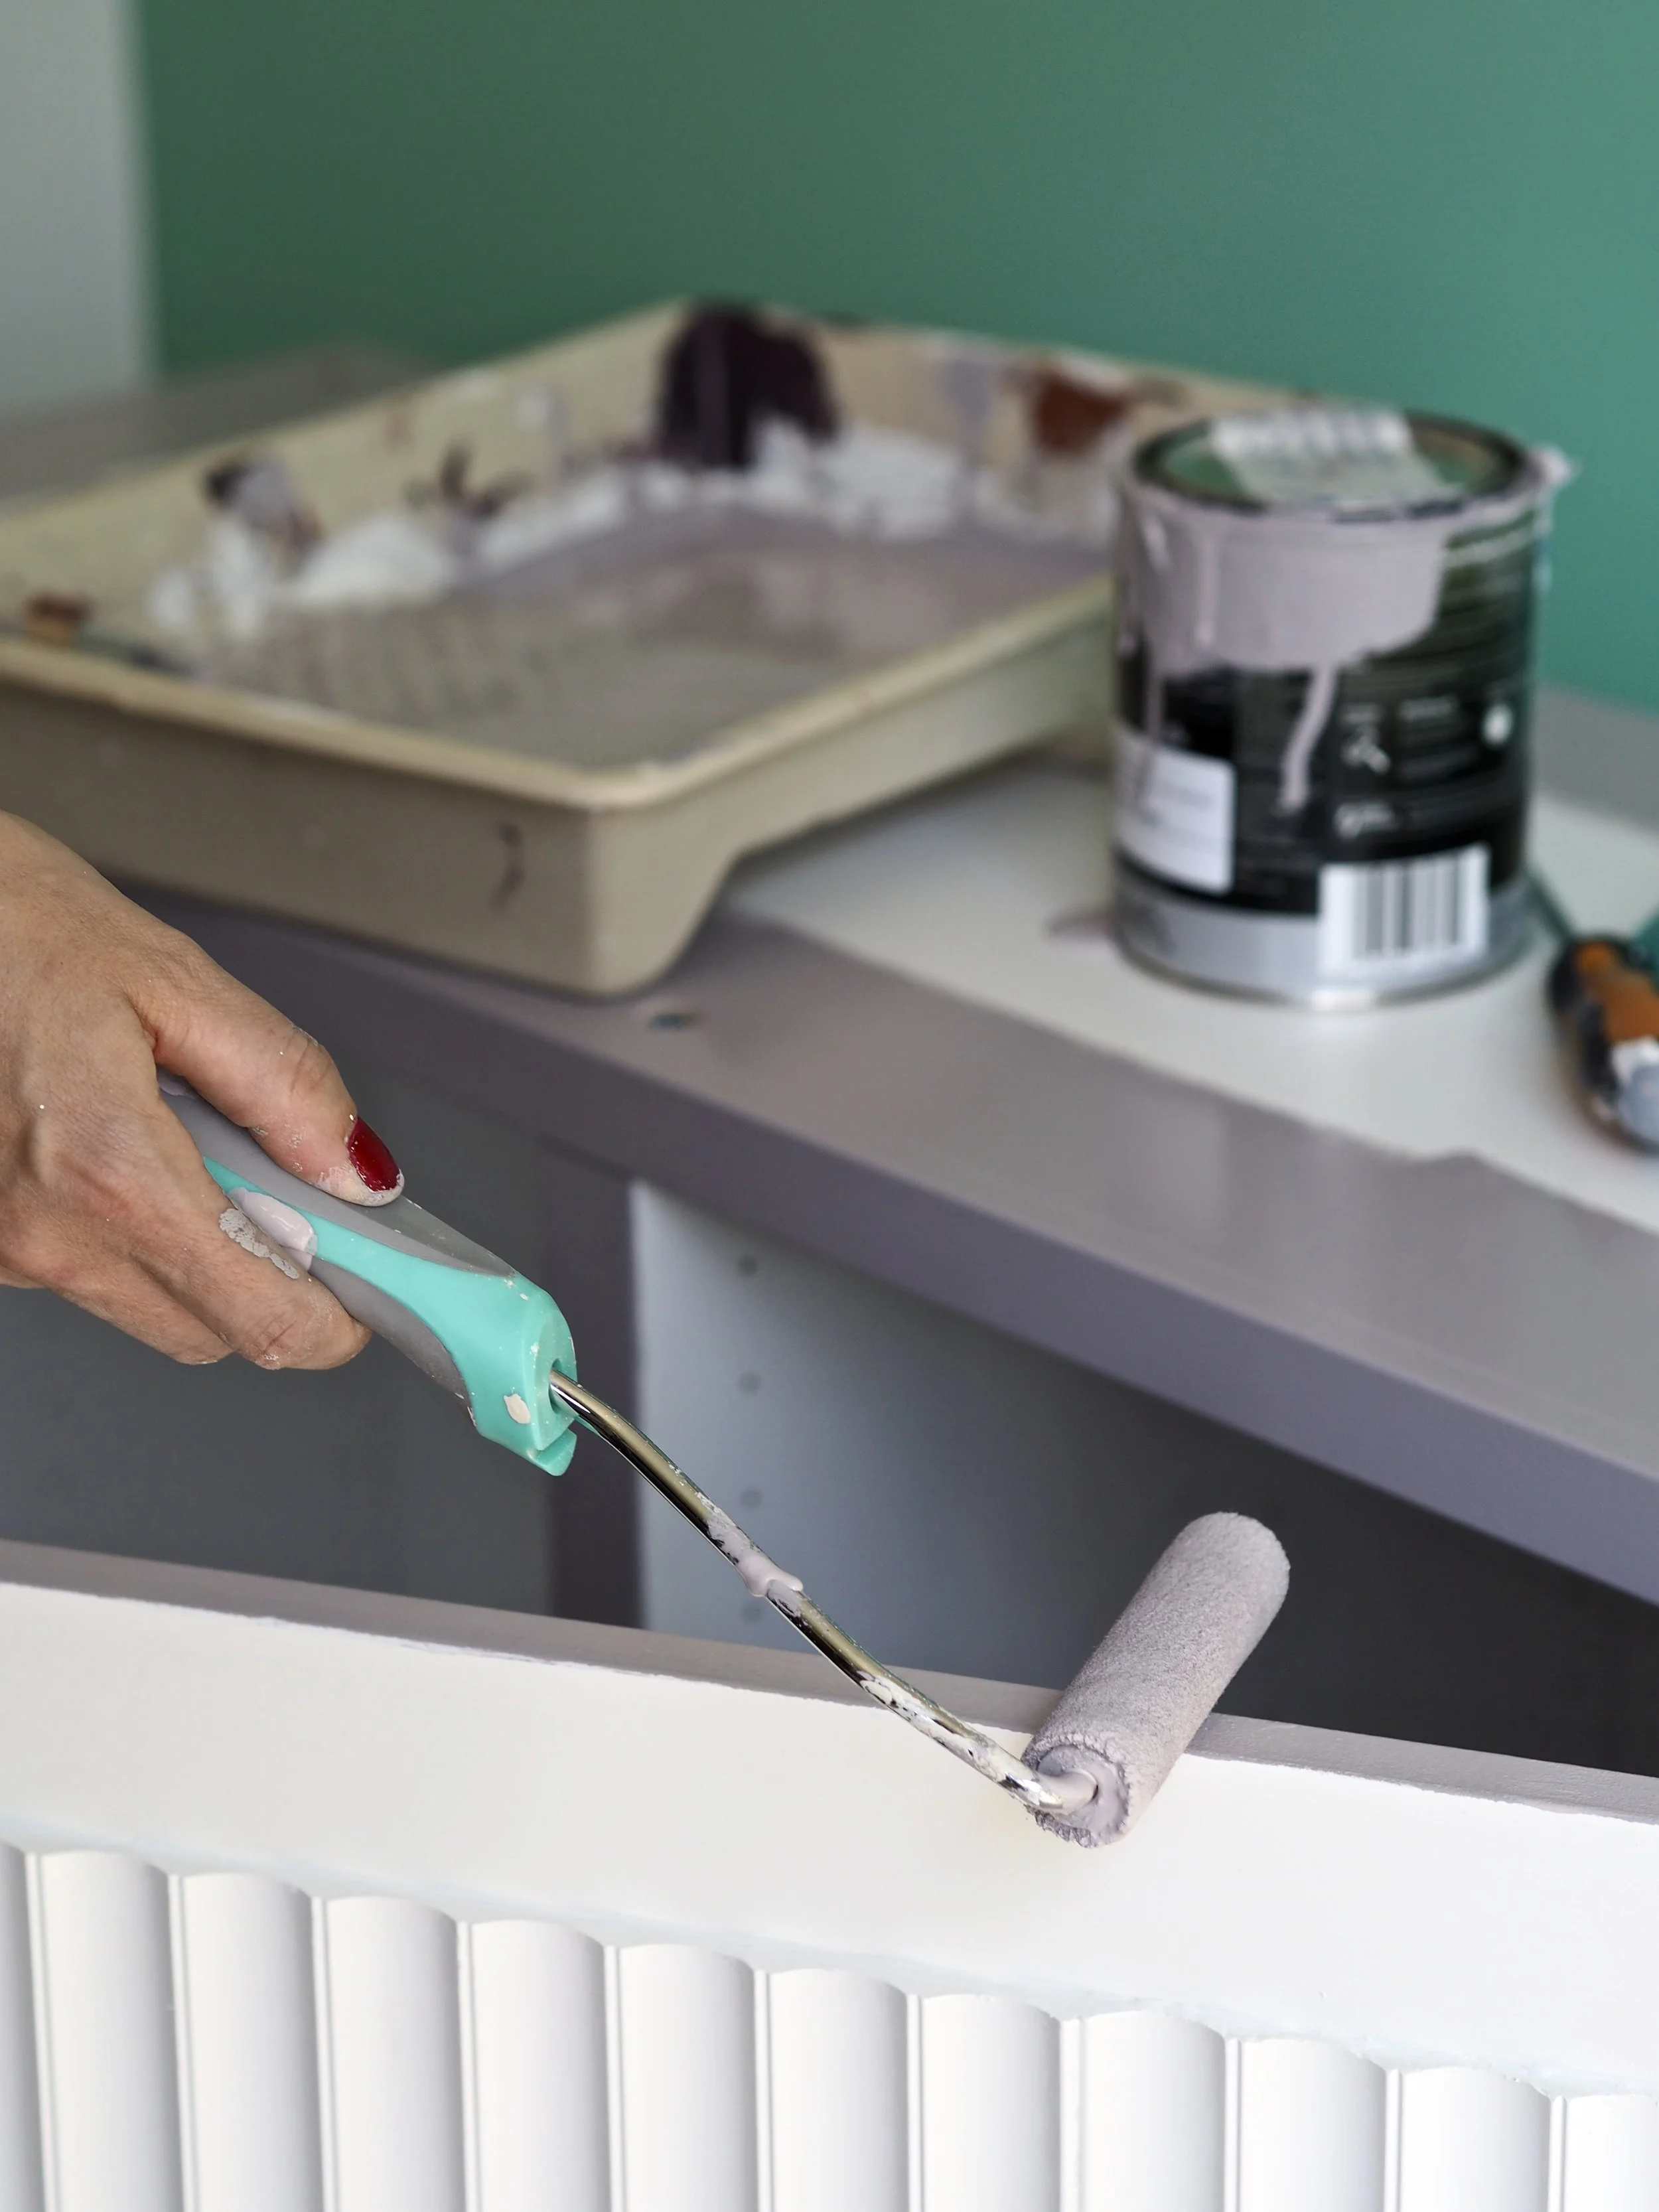
Always use low-pile roller sleeves suitable for cabinet painting to get the best finish.
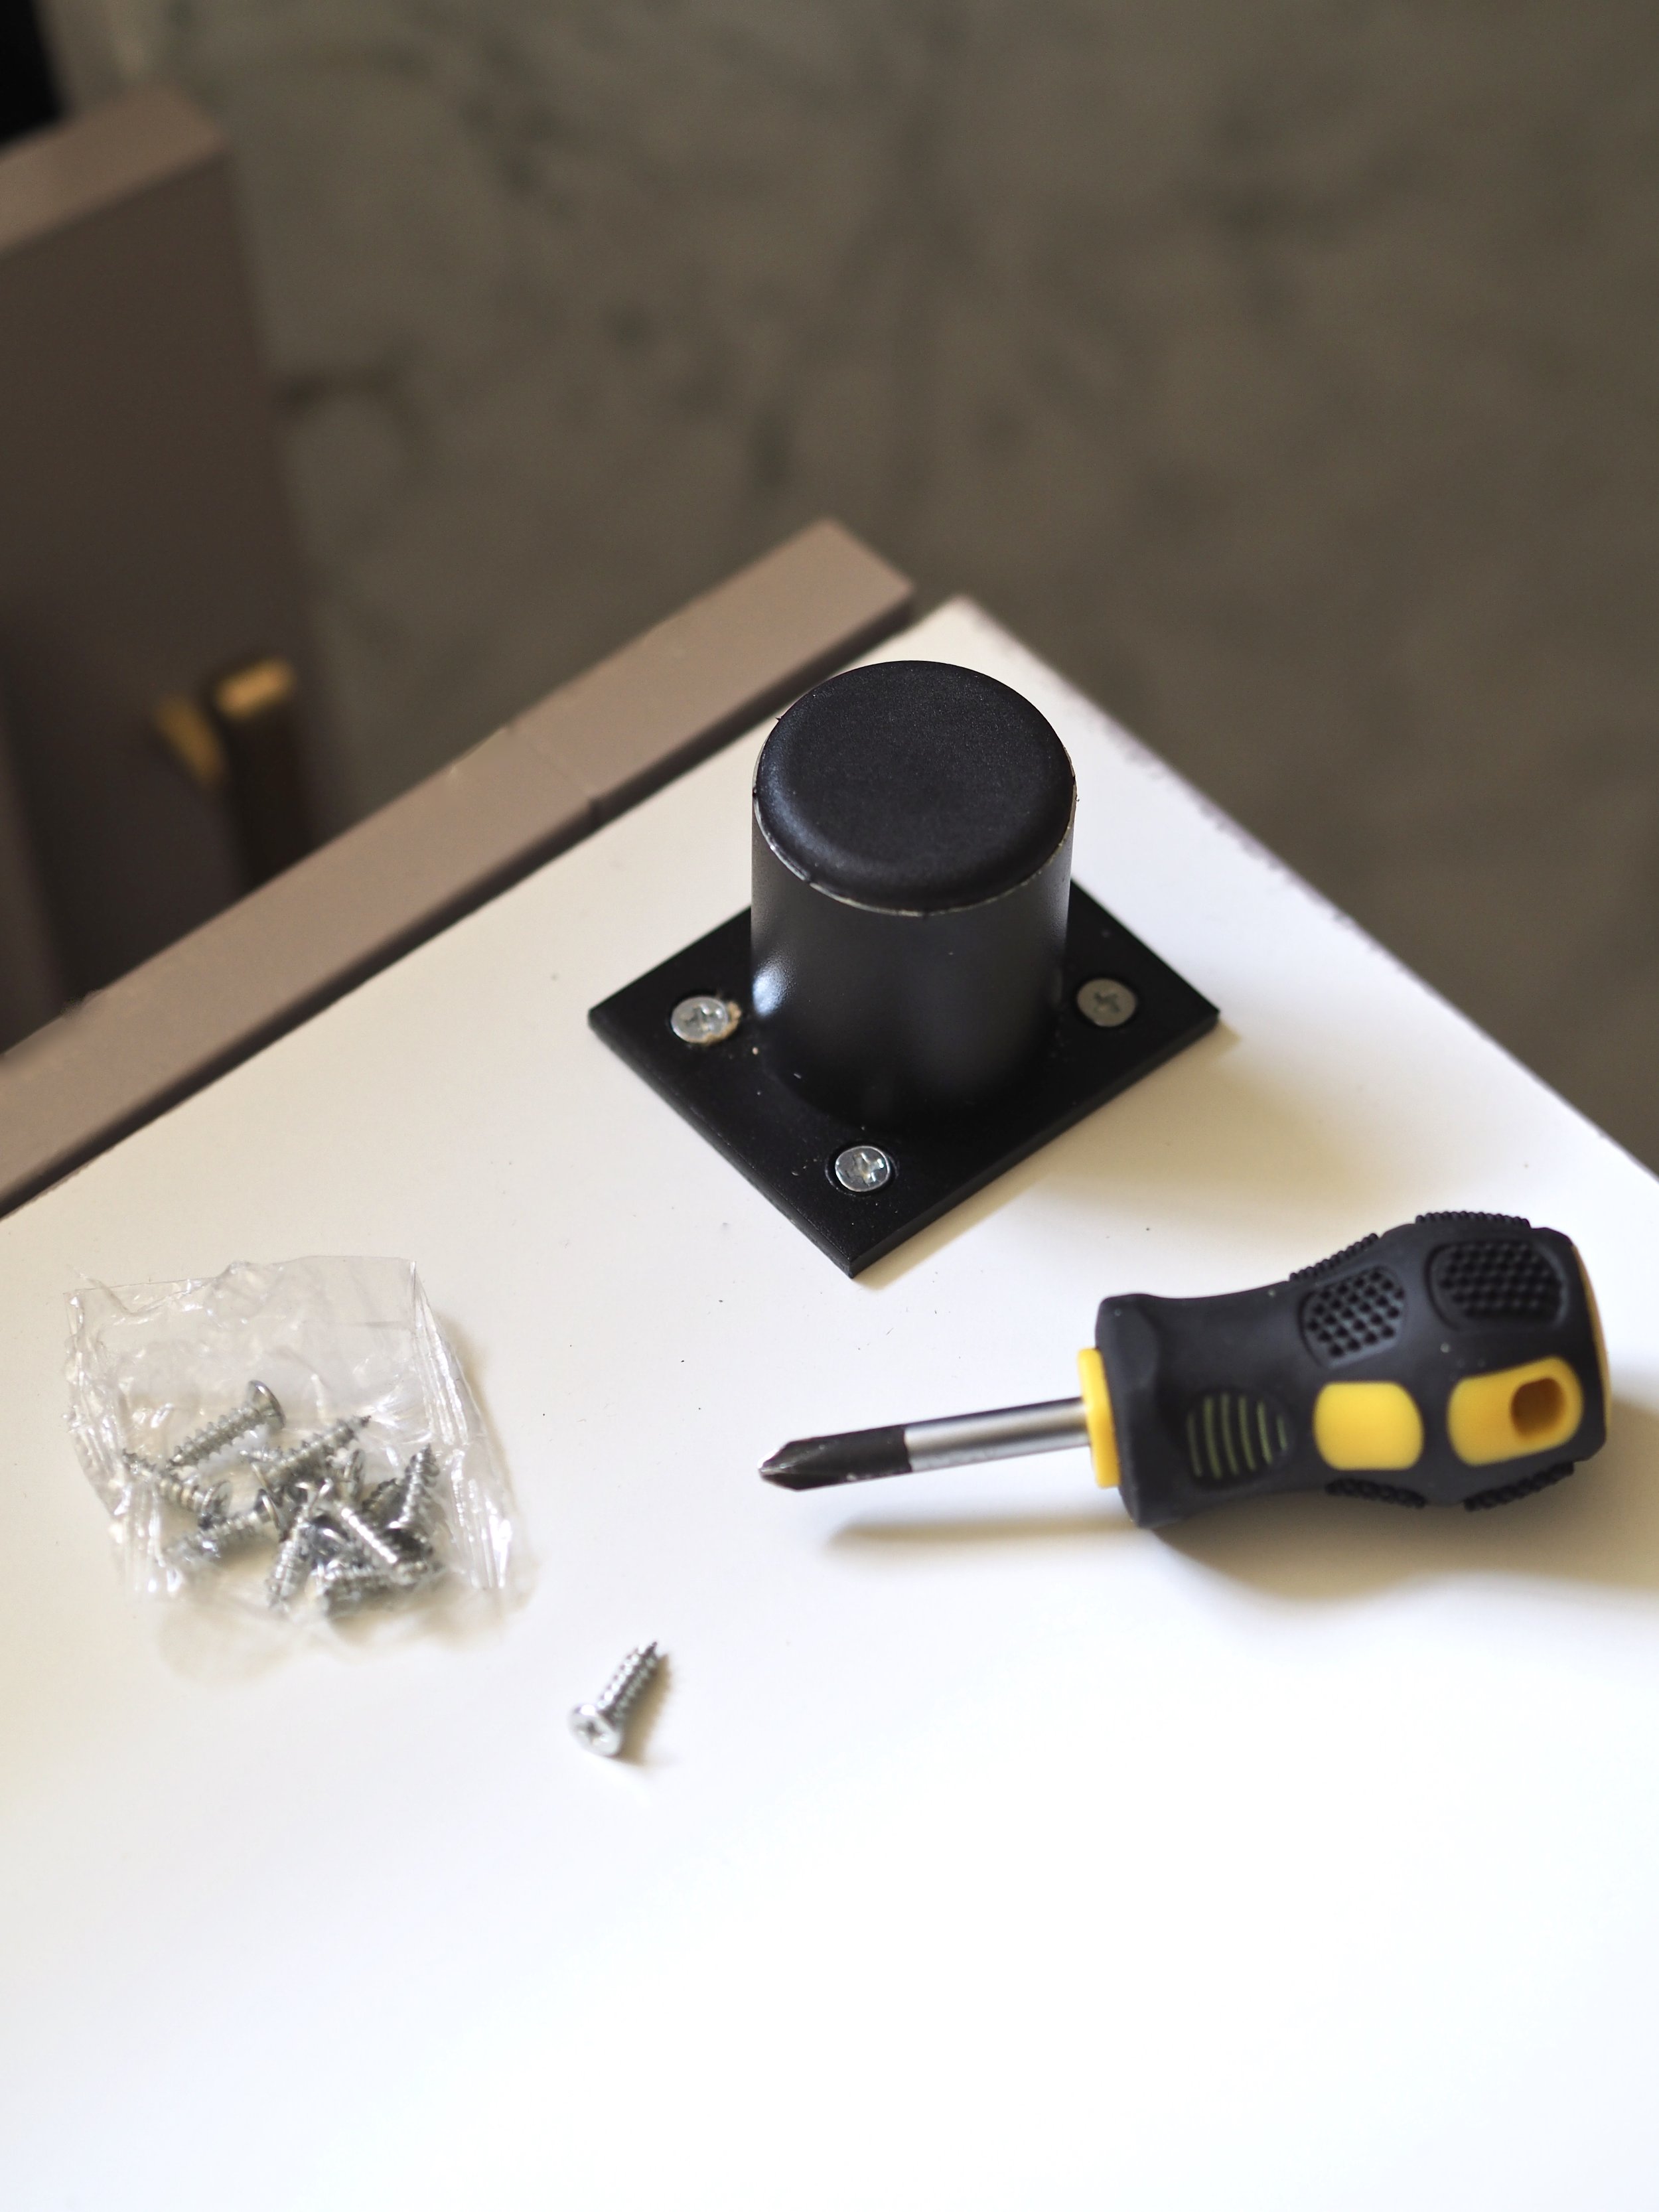
I did not want to purchase the BESTÅ legs that IKEA offers as they are ugly and bulky; instead, I purchased these 5cm furniture legs from Amazon which gave my unit a boost off the floor without being too attention-grabbing.
Once the paint had cured, I applied my Plank Hardware LUDLOW handles in brass. You can buy them here (if you purchase them before the 6th June 2022, you can get 15% off with my exclusive code: PLANKPROJECTS_melanielissackinteriors)
The BESTÅ unit really needs a top, so I went back to the worktop supplier's yard which cut to size some marble for my kitchen splashback for another piece. I dug out a lovely white and grey veined slab from their pile of offcuts (that remain from larger kitchen install projects) and got it polished up on the three edges that would be on show. For this 120cm x 40cm piece of real marble, I paid £130. A piece of marble this size is really heavy and requires two people to lift it onto the BESTÅ, but it weighs down the unit well and stops it from toppling on any uneven surfaces.
My BESTÅ has given me loads of storage space and is unrecognisable from the white box that I built at the start! I’m really happy with it!