


The Rubik's cube is the world’s most-sold toy, and you’ve probably come across one. You’ve probably picked it up and tried to play around with it too, turning the sides in hopes of matching at least a few of the pieces. But solving the Rubik's cube on your own without any help is a very difficult feat. It took the creator, Erno Rubik, two months himself!
This blog aims to serve as your guide into the world of Rubik's cube solving and your journey towards completing the cube.
The Basics
1. Colours
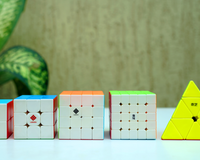
The cube has 6 sides, each representing a colour - white, yellow, blue, green, orange and red.
2. Pieces
There are three types of pieces -
- Centres - these remain fixed and serve as a guideline to solve the puzzle. On a solved cube, all the pieces of a particular colour surround the centre of that colour. On a scrambled cube, the centre represents the side on which the pieces of a particular colour are supposed to be.
- Corners - As the name suggests, the corner pieces are located on the corners of the cube. Each piece is made up of three different colours. There are 8 corners on any cube shape, and thus there are 8 corners on the Rubik's cube.
- Edges - The edges are the pieces between two corners. They are made up of two colours. There are 12 edges on the Rubik's cube.

3. Notation
The [] notate the movement of the layer from the natural holding position for a better understanding
- R - Right side clockwise [Right side upwards]
- R’ - Right side anticlockwise [Right side downwards]
- L - Left side clockwise [Left side downwards]
- L’ - Left side anticlockwise [Left side upwards] (Note: L and R may be confusing at first since the moves are opposite to each other)
- F - Front side clockwise
- F’ - Front side anticlockwise
- U - Upper face clockwise
- U’ - Upper face anticlockwise

How is the Cube Solved?
A common misconception is that the cube is solved one colour at a time. This is simply not possible because of the nature of the pieces and the design of the cube. Instead, we approach the cube layer by layer. The bottom layer is solved first, the middle layer next and the last layer towards the end, building the layer up on the previous one.
The method covered in this blog is known as the beginner’s method. In the beginner’s method, the solve is divided into 6 steps -
1. First layer- White cross
- White corners
- Non-yellow edges
- Yellow cross
- Yellow corners and edges
- Completing the top layer

Let’s dive into each step now.
Step 1:- First layer
White Cross
The cross is commonly started off on white and this tutorial uses white as the starting layer as well. The steps to solve the cross are enlisted below.
- Locate any white edge on your cube and identify the non-white part of the edge (an edge has two colours, so a white edge would have a white part and a different coloured non-white part).
- Match the non-white part to its own centre by hit and trial - this should be easy to do in 2-3 moves.
- Once the piece has matched its centre, rotate the piece so that the white part matches the white centre as well.
You have successfully solved one piece! Now, repeat this process for the other white edges as well until you end up with a white cross. 
After matching all the layers, the cube will look like this
White Corners
The white corners are the easiest to learn. Before moving on, try performing this sequence of moves on your cube - R U R’ U’. You have just learnt your very first algorithm! An algorithm is a series of moves that helps us move around pieces on the cube without disturbing the final positions of other pieces. 
- Start off by positioning your cube so that the white centre is at the bottom.
- Locate a white corner in the top layer. Identify the non-white parts of the white corner.
- Move the top layer until the white corner ends up between the corresponding centres of the non-white parts (refer to image).
- Perform the algorithm - R U R’ U’ until the white corner is correctly solved.
- Repeat for all white corners.
Step 2:- Second layer
1. Non-yellow edges
Algorithms used
- U R U’ R’ U’ F’ U F. [centre on right]
- U’ L’ U L U F U’ F’. [centre on the left]
The second layer works on the positioning of non-yellow edges:
- Locate a non-yellow edge.
- Identify the part of the edge in front of you and match it with the centre of the same colour by turning the top layer.
- Identify the part of the edge connected to the yellow centre and locate the corresponding centre.
- If the centre is on the right side of the current position of the cube, use the first algorithm If not, use the second algorithm.

After applying the algorithm to all other pieces, the cube will look like this
Step 3: Last Layer
1. Yellow cross - F R U R’ U’ F’
The yellow cross can be divided into three cases. The algorithm used for each case is the same, however, the initial positions vary. Identify the case on your cube and position it according to the corresponding position in the image. Simply repeat the algorithm until the cross is solved.

2. Positioning last layer edges - R U R’ U R U2 R’
We now match the edges in the last layer to their centres. Match any one edge of the top layer with its centre in the middle layer. Now, repeat the algorithm until all edges match their centres.

3. Last layer corners - U R U’ L’ U R’ U’ L
Now to match all the corner pieces in the top layer, find a corner that is already matched and keep it towards the front-right of the cube. If none of the corner pieces is in the right place, you can hold the cube in any orientation with the unmatched pieces on top and apply the algorithm.
4. Top layer corners - R’ D’ R D
Now, keeping the yellow side on top and the corner which is not aligned on the front right corner, use the above algorithm till the corner is aligned, then rotate the top layer and bring the unaligned corner to the front right corner and then again apply the same algorithm till the corner is solved. Repeat the process until all the corners are solved.
With this final step, the cube is finally solved
Congratulations on completing the cube! While the first-time solving is confusing, remember that you get better with each solve. It typically takes at least 5-10 solves to get comfortable with a new method, so keep practising.
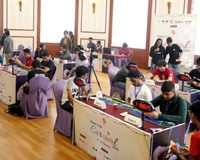
Once you’re comfortable with solving the cube, you may also start timing yourself. This would mark the start of your journey into the world of speedcubing. Find out more about how to start your cubing journey and the essentials required to do so, as well as how to improve!
About Author

Avani Sood
Avani Sood from Bengaluru has won 12 female national records overall and has been competing for the past 4 years. She started cubing when she was 11. Her main event is Megaminx. Apart from cubing, she loves to cook and read. She has participated in 10 competitions and won 1 podium.
The Rubik's cube is the world’s most-sold toy, and you’ve probably come across one. You’ve probably picked it up and tried to play around with it too, turning the sides in hopes of matching at least a few of the pieces. But solving the Rubik's cube on your own without any help is a very difficult feat. It took the creator, Erno Rubik, two months himself!
This blog aims to serve as your guide into the world of Rubik's cube solving and your journey towards completing the cube.


13 comments
sampath
Hey kid, you are insulting us. we don’t have time to do this silly things so that’s why we are not interested
...
I dont understand Positioning last layer edges.
Tim Baker
Yes 4 is correct it gets worse before better just keep going.
Aaron
Thank you for this feedback😁
Jijo joseph
Last step is wrong i cant do that
LJ....
Can’t understand what do you mean by ‘last layer corners’ and ‘top layer corners’? Are they same? Can you please explain what do you mean by ‘last layer’ and what is ‘top layer’?
Ma
I can’t do the last one
uhb
i dont get it
Ansh Shukla
Please send me the list of solving
M
Nm I figured it out! Thank you!! X)
M
Can you confirm #4 is right please? wordings are not very clear
Elisei V.
Impossible
Mahin
Full