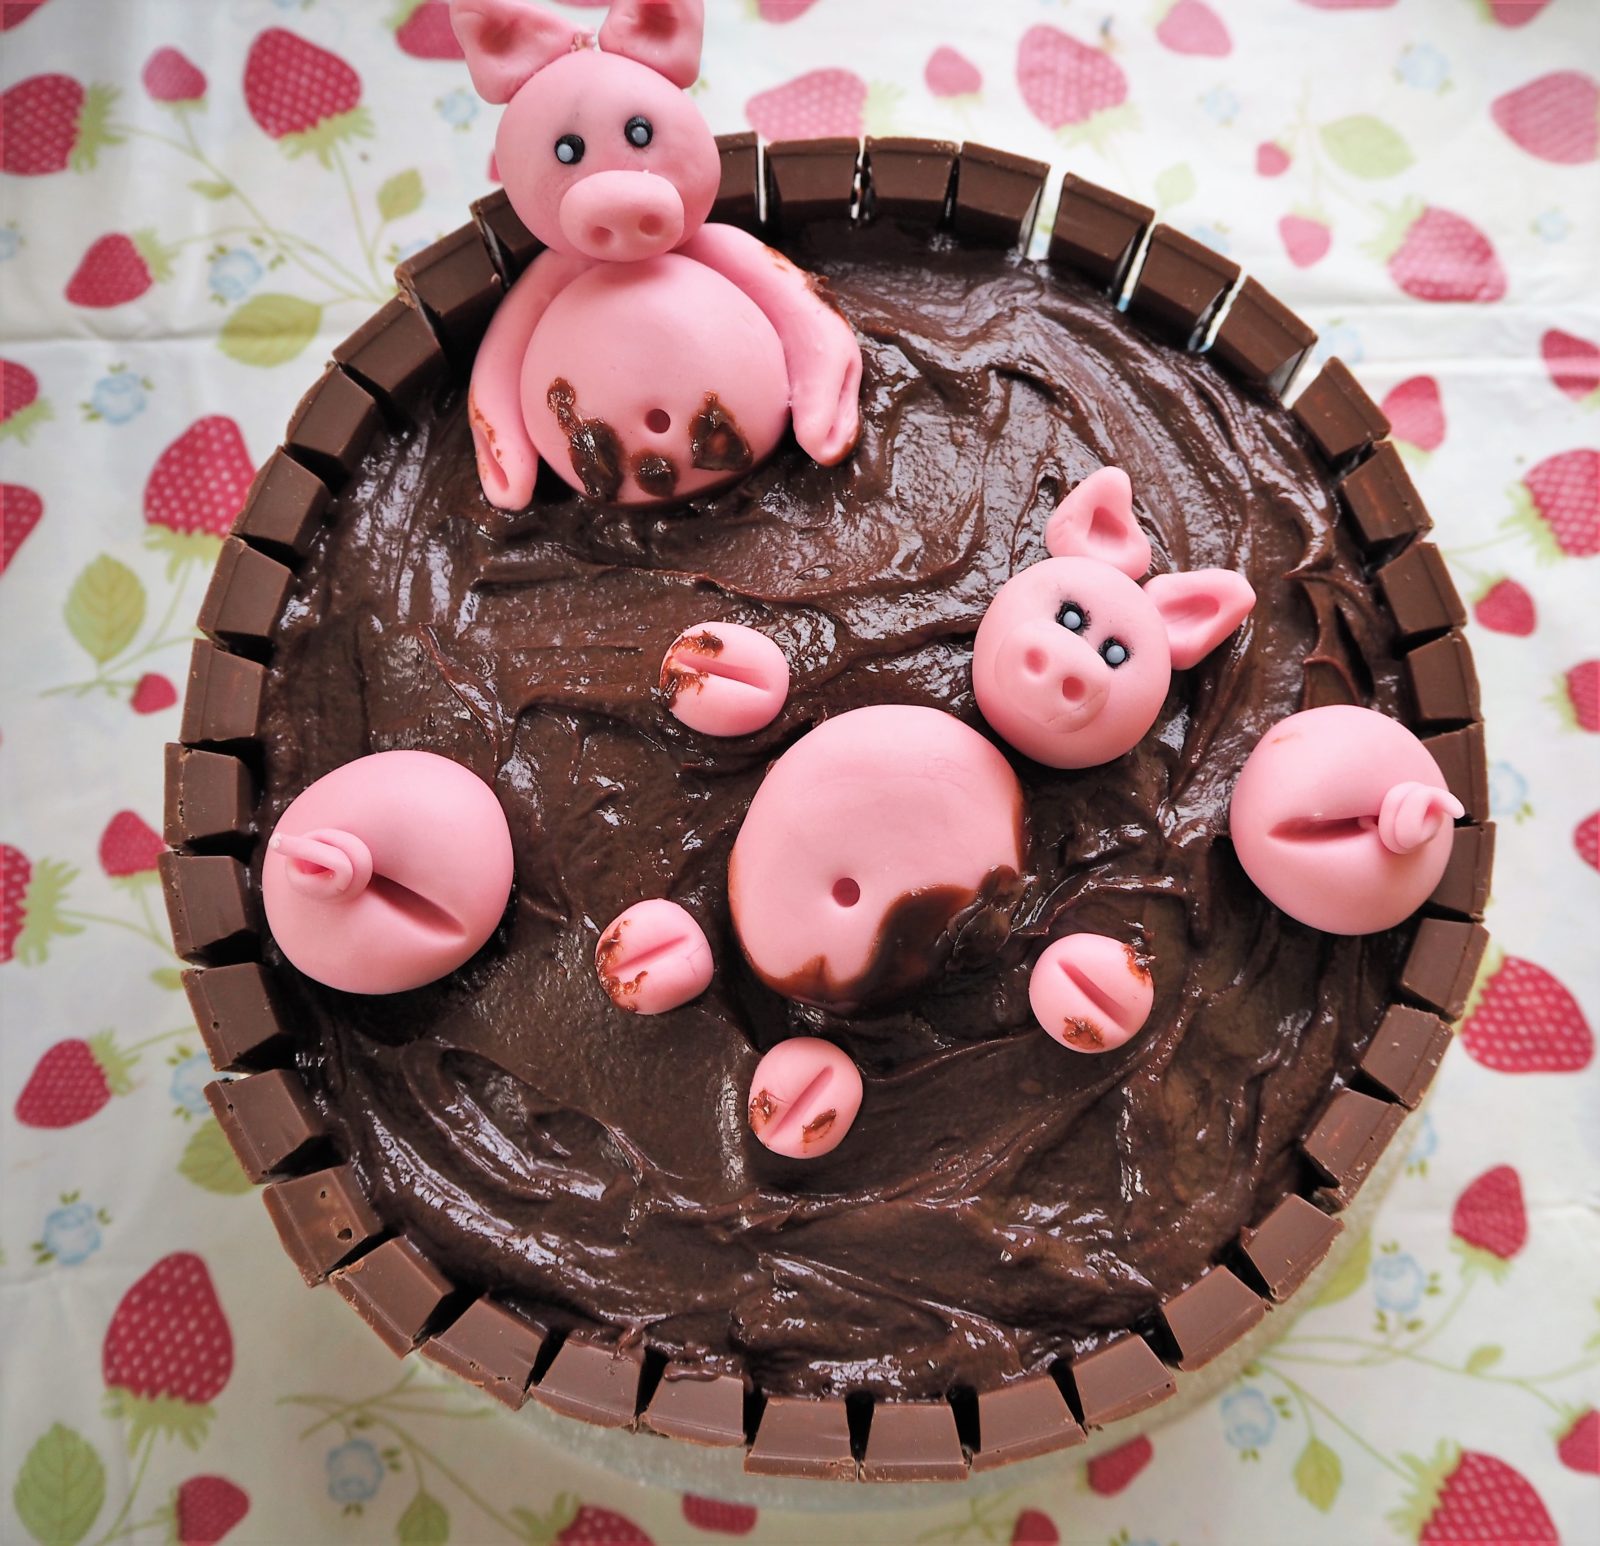
With my nephews birthday and my sisters birthday coming very soon, we decided to make a fun chocolate pig cake just because we can!

Chocolate Pig Cake Recipe: This makes an 8 inch cake round
Gluten Free, Wheat Free
You will need:
4 packs Tesco Free From gluten free Belgian chocolate wafers or gluten free chocolate fingers
3 oz ground almonds
200g Gluten Free Self Raising Flour
225g butter, softened
225g (80z) Caster sugar
4 eggs
4 tablespoons natural yoghurt
3 tablespoons cocoa powder
1 teaspoon vanilla extract
For the chocolate filling and covering of cake:
200g dark or milk chocolate
1 oz Butter
2 tablespoons milk
150g icing sugar (sieved)
For the chocolate ganache
100g dark chocolate
150 ml single or double cream
1 oz butter
For the pigs
I used ready to roll pink icing 250g (Sainsbury’s) and edible glue
What to do:
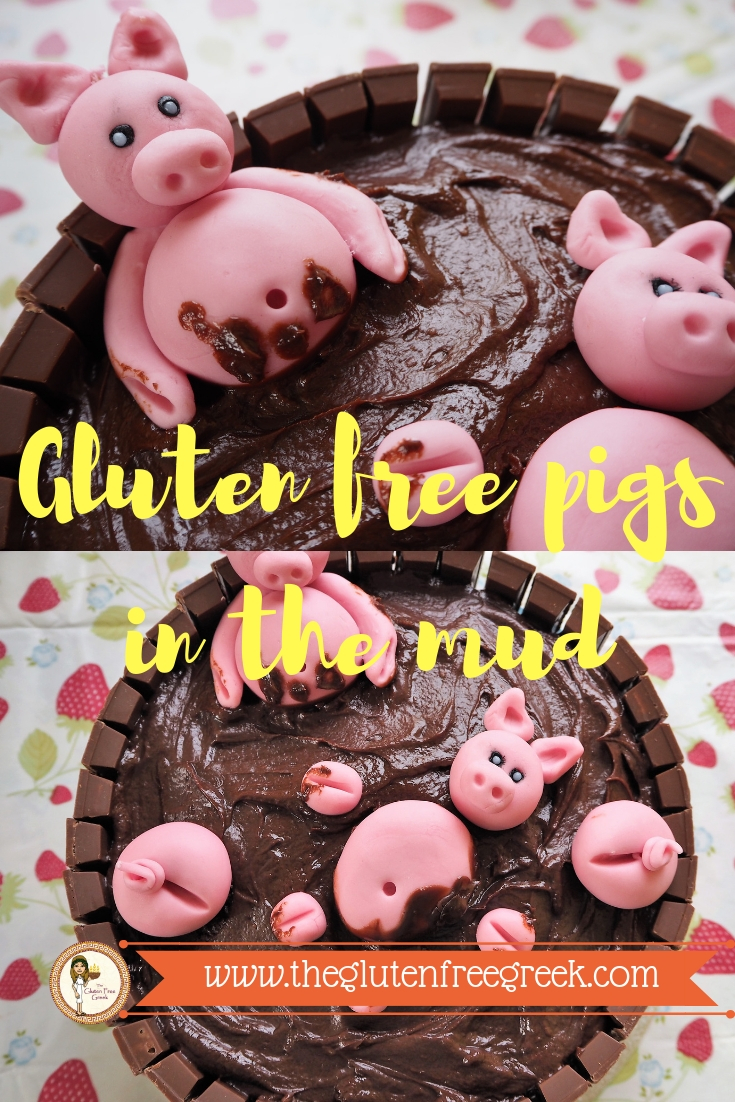
How to make the Piggies:
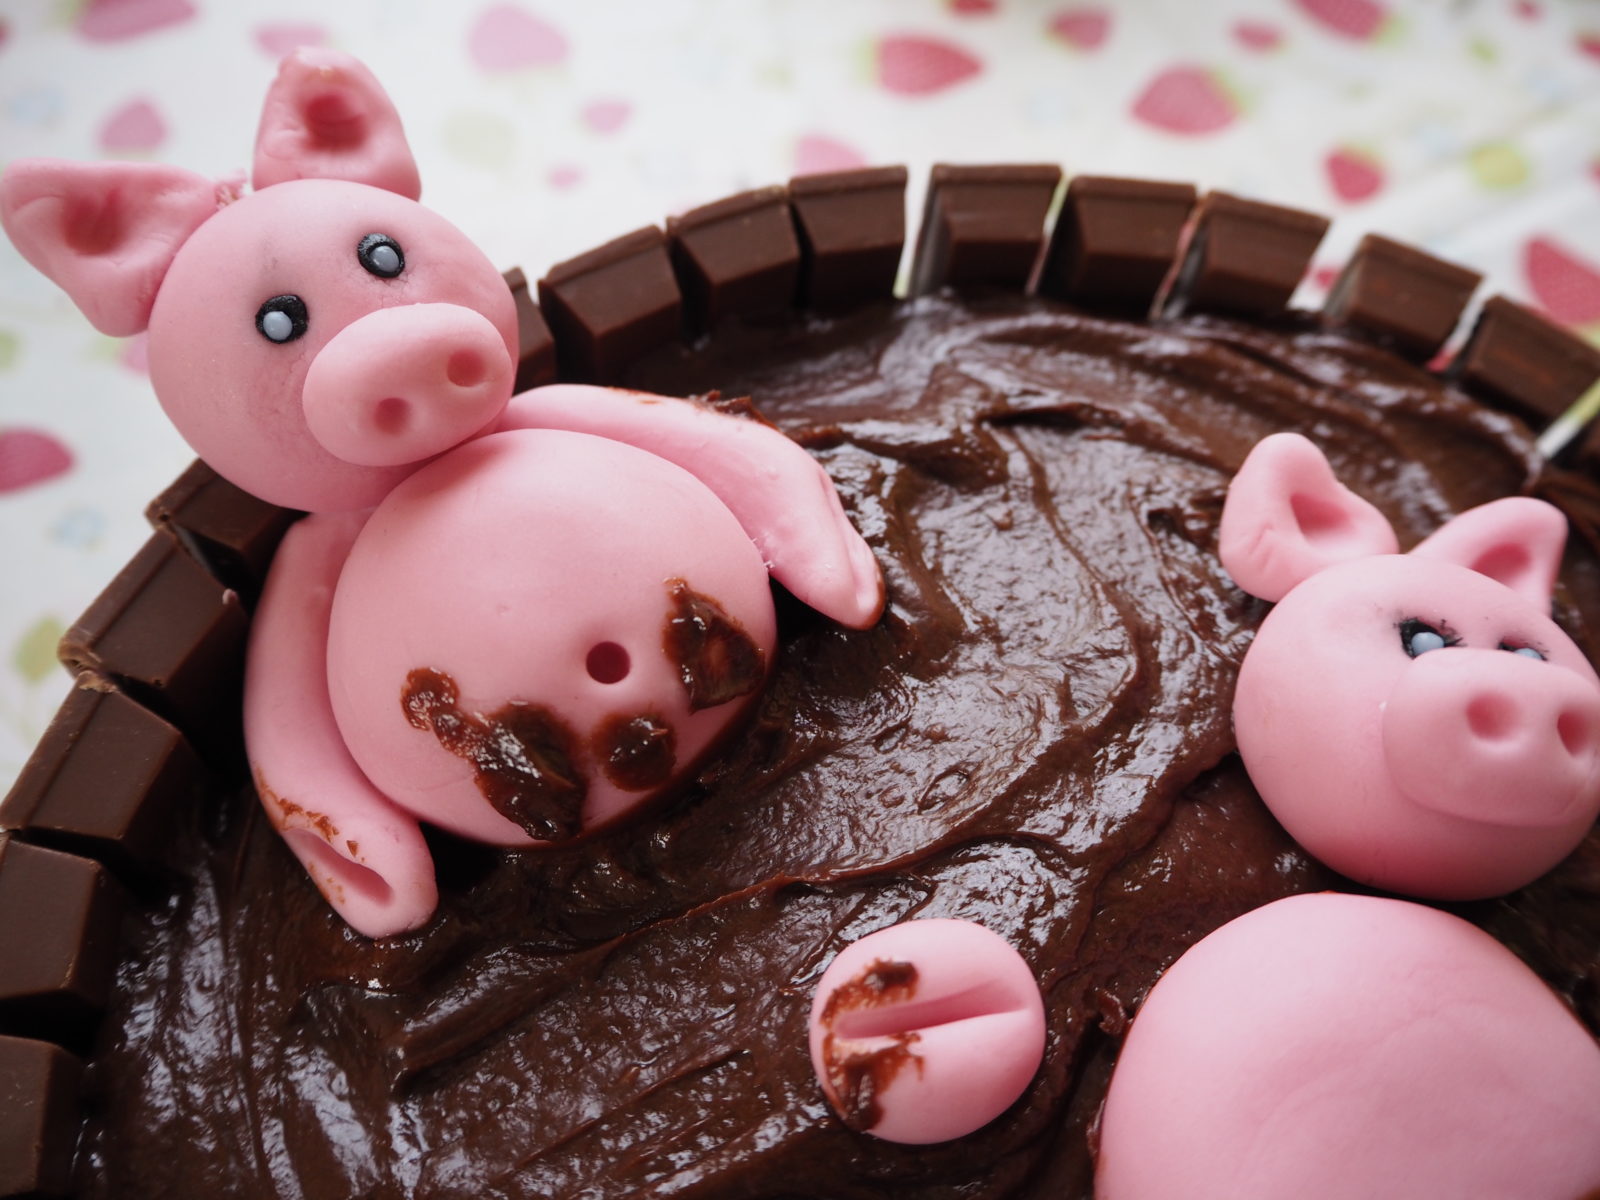
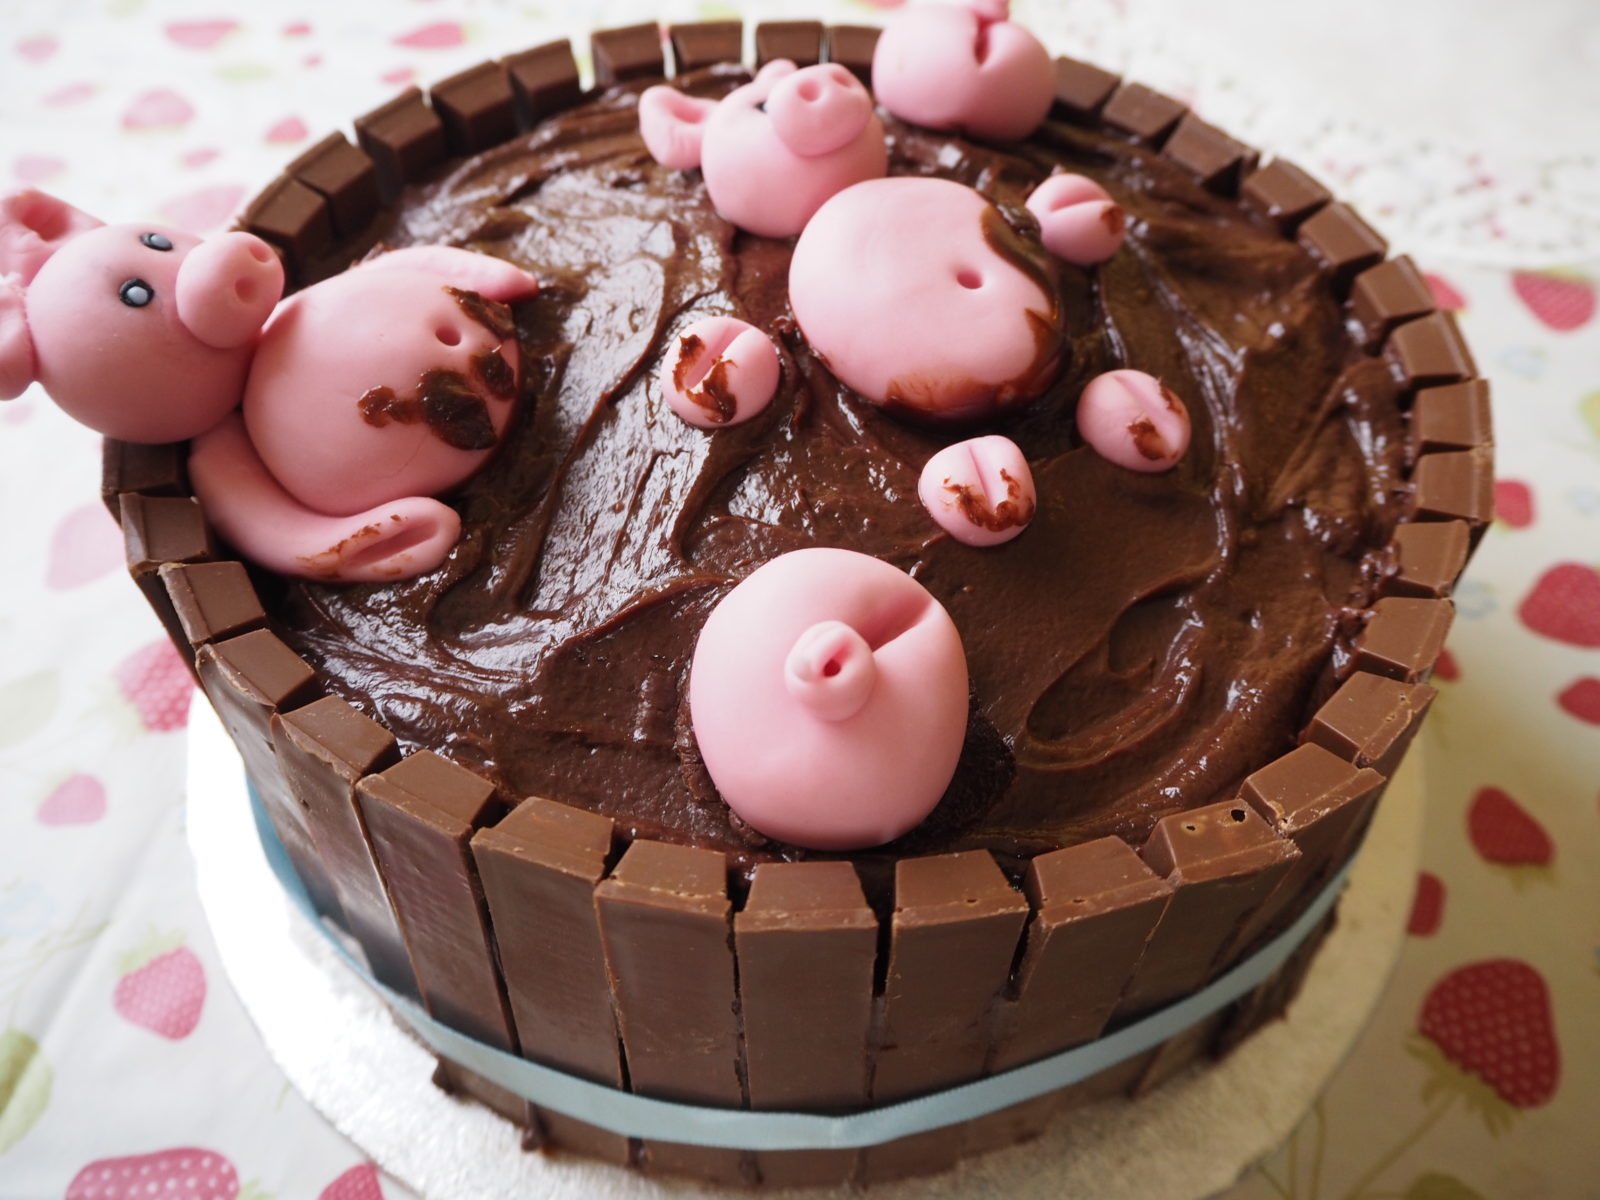
For bathing pig
Take 20g pink icing and roll into a ball for the pigs head. Take 30g for its tummy and roll into another flatter ball. Make 4 pea sized balls for the trotters. Make a small oval shape for the snout and 2 small triangle pieces for the ears. Using a tooth pick or decorating utensils, make the indentations. Attach the ears, head and snout with edible glue.
For sitting pig
Same as bathing pig except you need 5g each for pigs arms rolled into a sausage shape. Make features for the pig using a toothpick. If pig doesn’t stay upright use a toothpick to anchor it.
For pig bottoms
20g icing rolled into ball. Make an indentation using a toothpick for the bottom cheeks, and then make a little hole. Roll the fondant out into a very thin worm shape and twirl into a little tail. Attach with edible glue.
You can use sugar balls for the eyes.
♥
Chocolate Pig Cake Recipe: This makes an 8 inch cake round
Gluten Free, Wheat Free delicious chocolate pig cake!
Ingredients
- 4 packs Tesco Free From gluten free Belgian chocolate wafers or gluten free chocolate fingers
- 3 oz ground almonds
- 200 g Gluten Free Self Raising Flour
- 225 g butter softened
- 225 g 80z Caster sugar
- 4 eggs
- 4 tablespoons natural yoghurt
- 3 tablespoons cocoa powder
- 1 teaspoon vanilla extract
- For the chocolate filling and covering of cake:
- 200 g dark or milk chocolate
- 1 oz Butter
- 2 tablespoons milk
- 150 g icing sugar sieved
- For the chocolate ganache
- 100 g dark chocolate
- 150 ml single or double cream
- 1 oz butter
- For the pigs
- I used ready to roll pink icing 250g Sainsbury's and edible glue
Instructions
-
Pre heat oven to 160°C/140°C Fan/Gas Mark 3. Grease and line your two 8 inch baking tins with baking paper.
-
In a large bowl, beat the butter and sugar. Add eggs and continue to beat. On a lower speed, gradually combine all the other ingredients.
-
Transfer the cake mixture evenly into the baking tins.
-
Bake for 1 hour. Check the cake is done by using the cake tester.
-
Leave to cool.
-
Over a pan of boiling water, place a bowl with the chocolate, butter and milk. Once melted, mix in the 150g sieved icing sugar to form a smooth paste.
-
Using the chocolate mixture, sandwich the cakes together, then spread the rest around the sides and a thin layer for the top.
-
Break the chocolate wafers into singular strips and place around the edge of the cake. Tie with a piece of string so that it holds the cake together until set. Put in fridge.
-
Once cool, you can make the chocolate ganache. Melt the dark chocolate and butter together and add the hot cream, making sure it is more of a liquid mixture.
-
Once it has cooled a little, pour on top of the cake to make it look like mud. Pop straight back into the fridge.
-
Take pig cake out of fridge and then you can add your piggies!
-
Tie your finished cake with a nice ribbon.
-
How to make the Piggies:
-
For bathing pig Take 20g pink icing and roll into a ball for the pigs head. Take 30g for its tummy and roll into another flatter ball. Make 4 pea sized balls for the trotters. Make a small oval shape for the snout and 2 small triangle pieces for the ears. Using a tooth pick or decorating utensils, make the indentations. Attach the ears, head and snout with edible glue.
-
For sitting pig Same as bathing pig except you need 5g each for pigs arms rolled into a sausage shape. Make features for the pig using a toothpick. If pig doesn't stay upright use a toothpick to anchor it.
-
For pig bottoms 20g icing rolled into ball. Make an indentation using a toothpick for the bottom cheeks, and then make a little hole. Roll the fondant out into a very thin worm shape and twirl into a little tail. Attach with edible glue.
-
You can use sugar balls for the eyes.
Enjoy this little pig cake!
♥
Have you pinned this? Check out my pinterest!

YUM YUM YUM!!! xoxo